Many meditation teachers suggest setting up a special place in the house for practicing. Not only does having a special corner or part of the house serve as a visual reminder, it also provides the mind with a cue to start settling in. For my practice, I have been sitting on a beautiful matching zafu & zabuton set for a number of years. Tucked in the corner of the dining room, however, it has never been an out-of-the-way place where I could retreat. As a result, for a long time I was only able to do formal practice after my children went to bed or before they awoke.
Then one day last summer I had a crazy idea – why not build some kind of quiet getaway space – a meditation “escape pod?” This would allow me to sneak away for practice whenever I could fit time in my schedule.
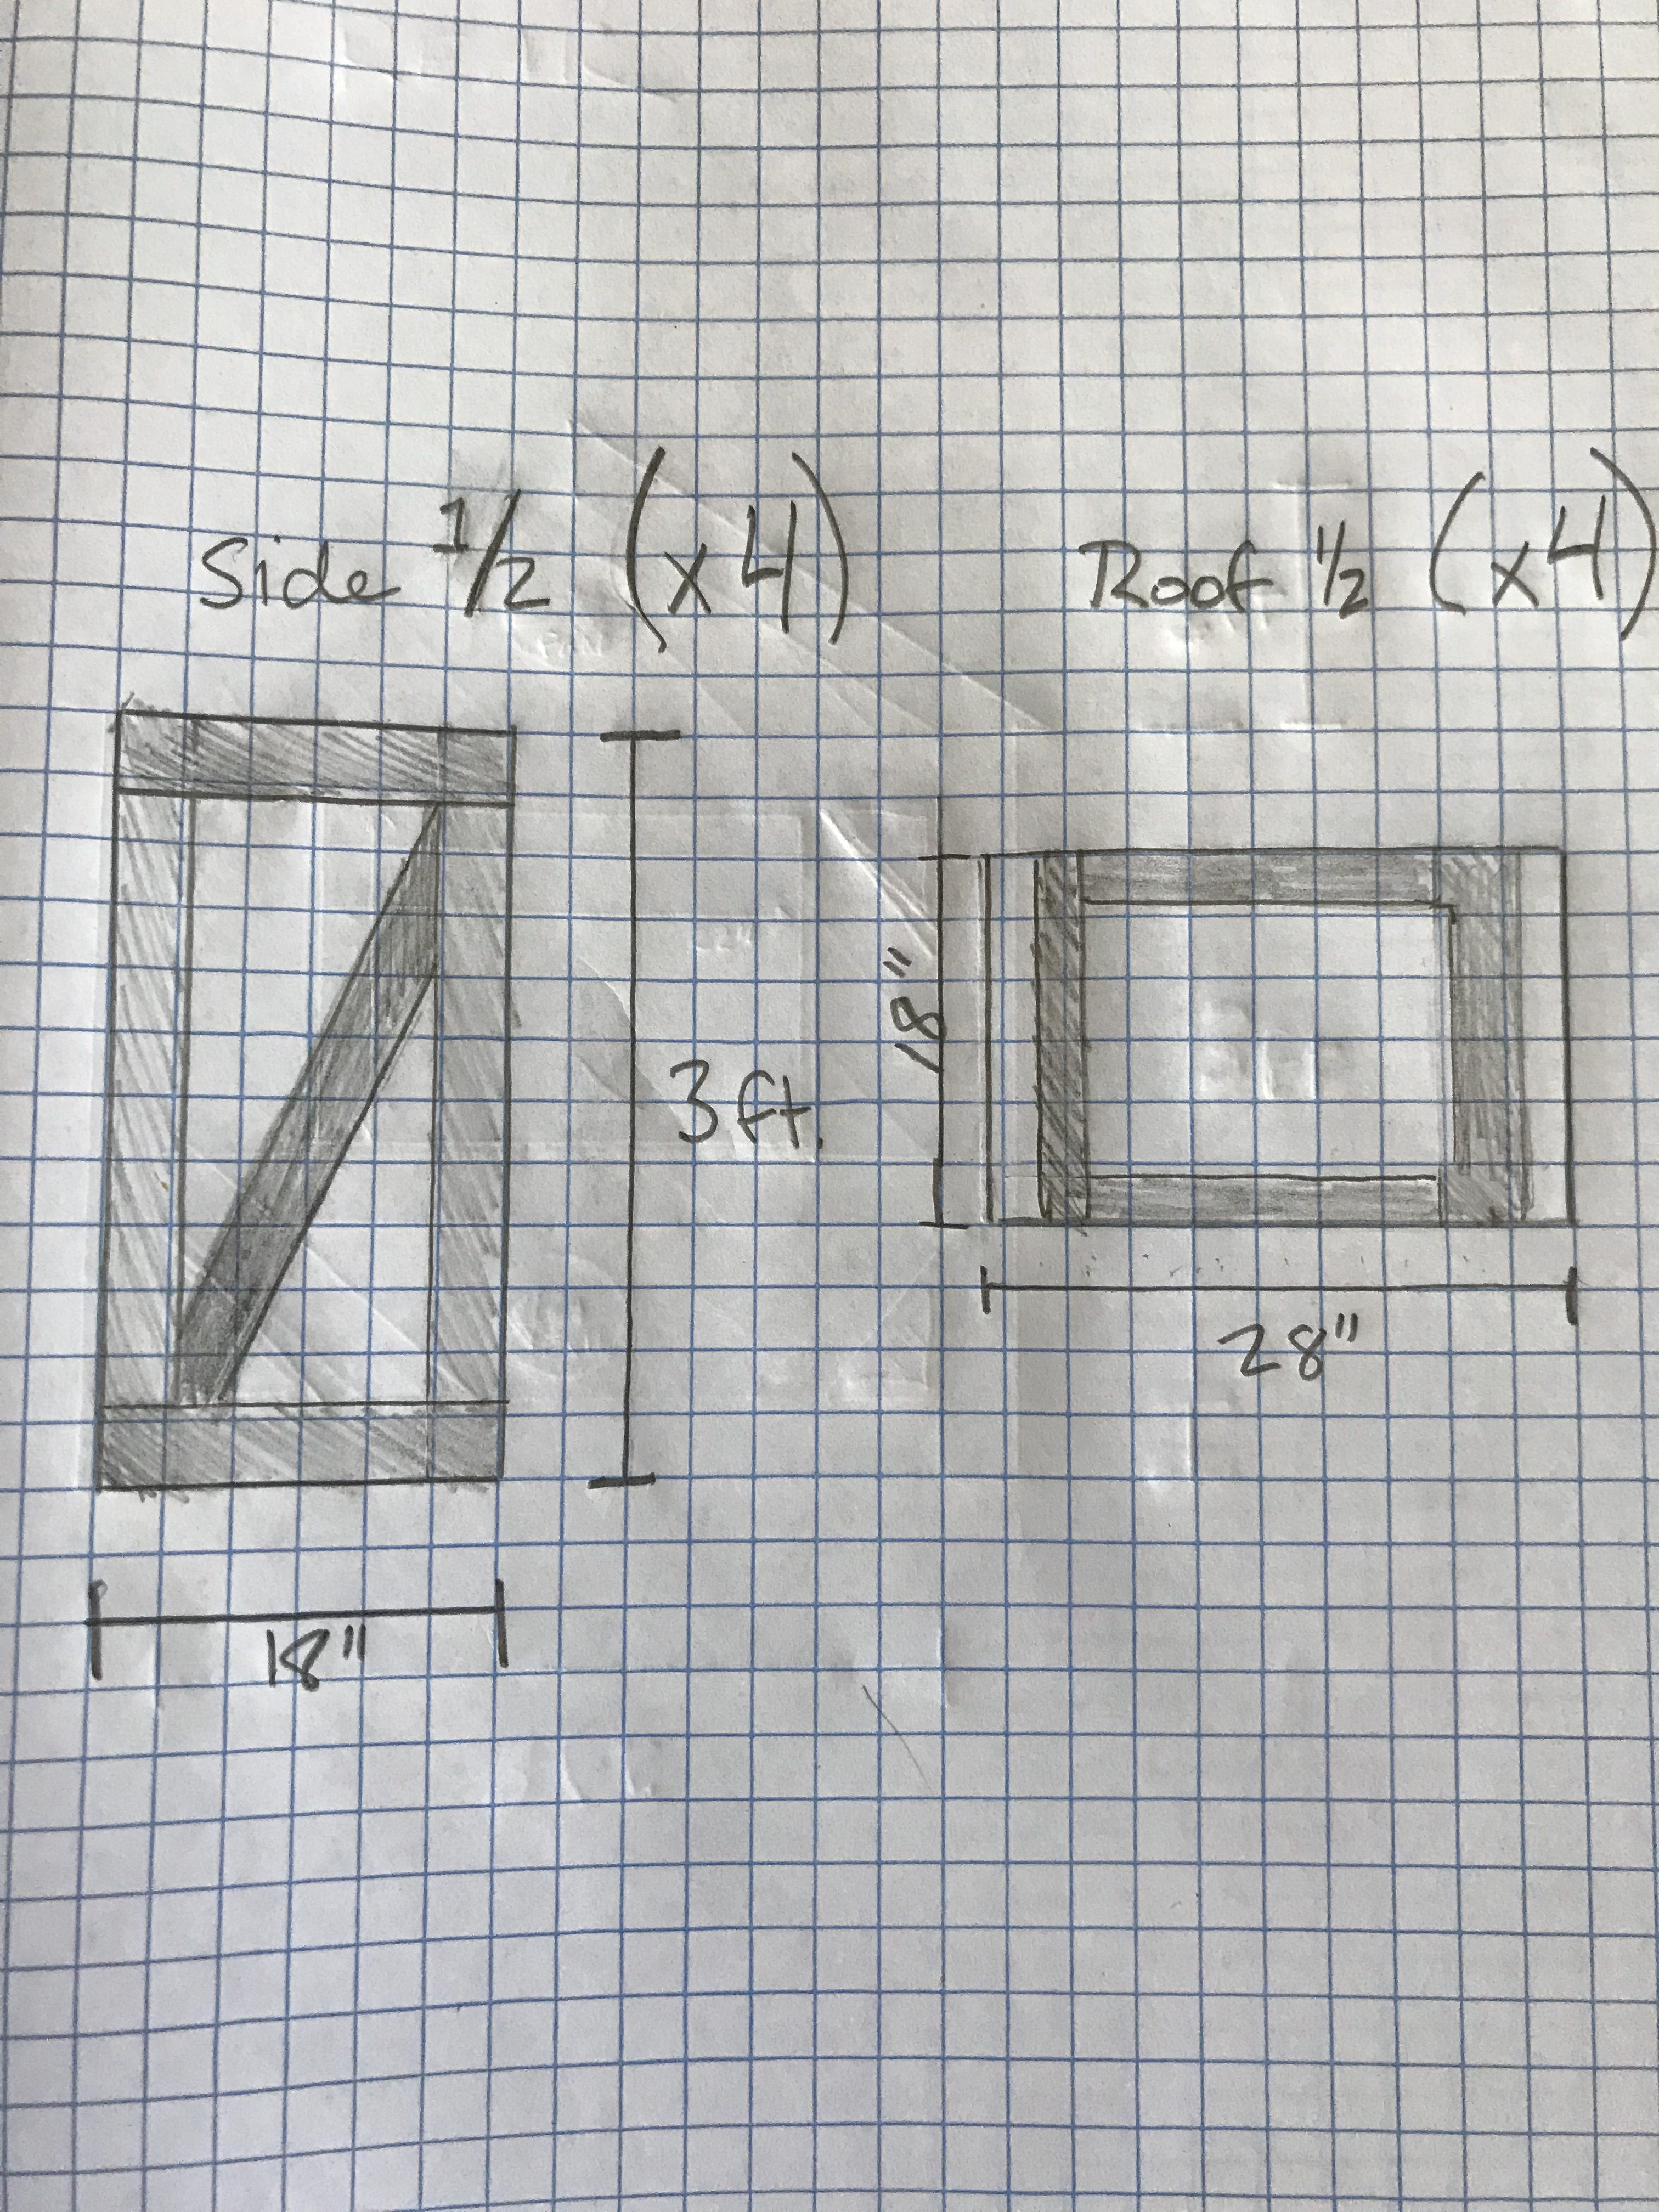
 So I drew up some plans. I wasn’t sure what it would look like when it was done, so I just started with what I knew. For one thing, I decide it would be just big enough to fit me sitting down. Any bigger and it would be too big to fit anywhere around the house. Another thing I knew was that I wanted to isolate as much sound as possible, so I did a bit of research. I found that layers of drywall with tubes of a paste called Green Glue would give me the most sound-dampening bang for my buck.
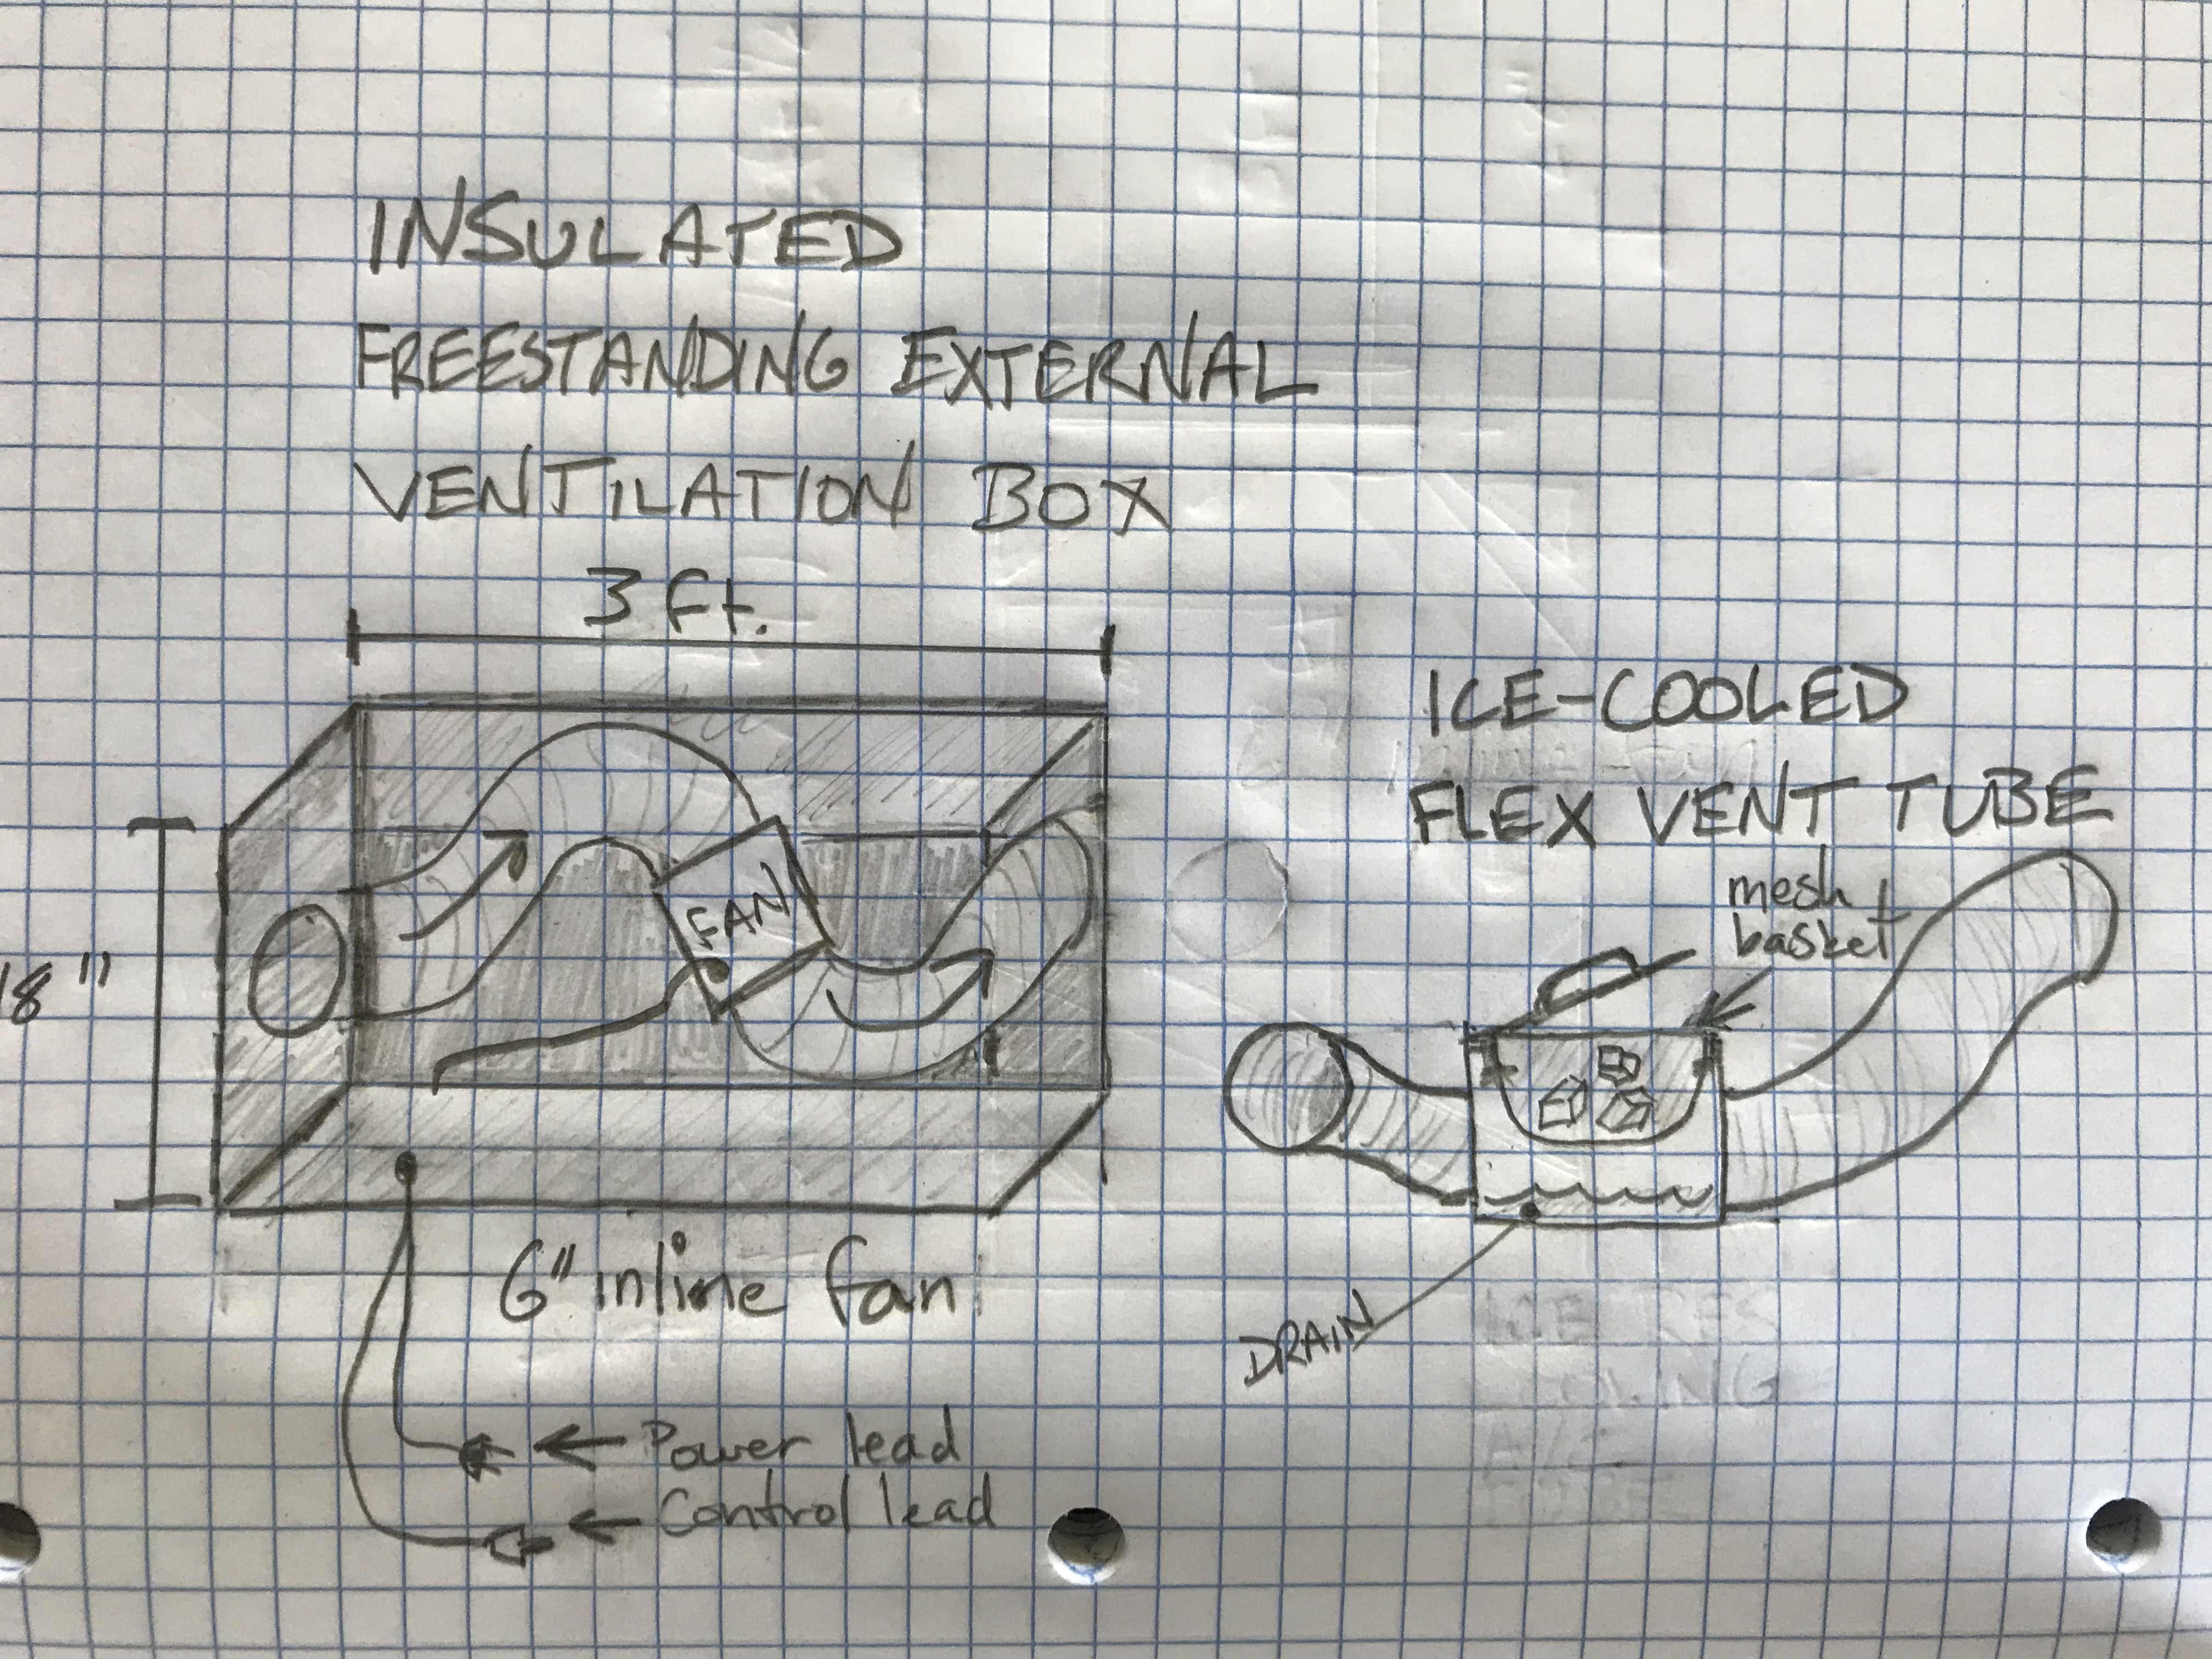
Another idea I had was that it needed to have a supply of fresh air. Because fans can be loud, I decided to build an external box to hold an inline fan. A friend suggested that I could use an icebox inline that would allow me to cool off the air during the summer. I drew up some plans for that.
Next I started by framing it up in my garage.
Why not build some kind of quiet getaway space – a meditation “escape pod?”
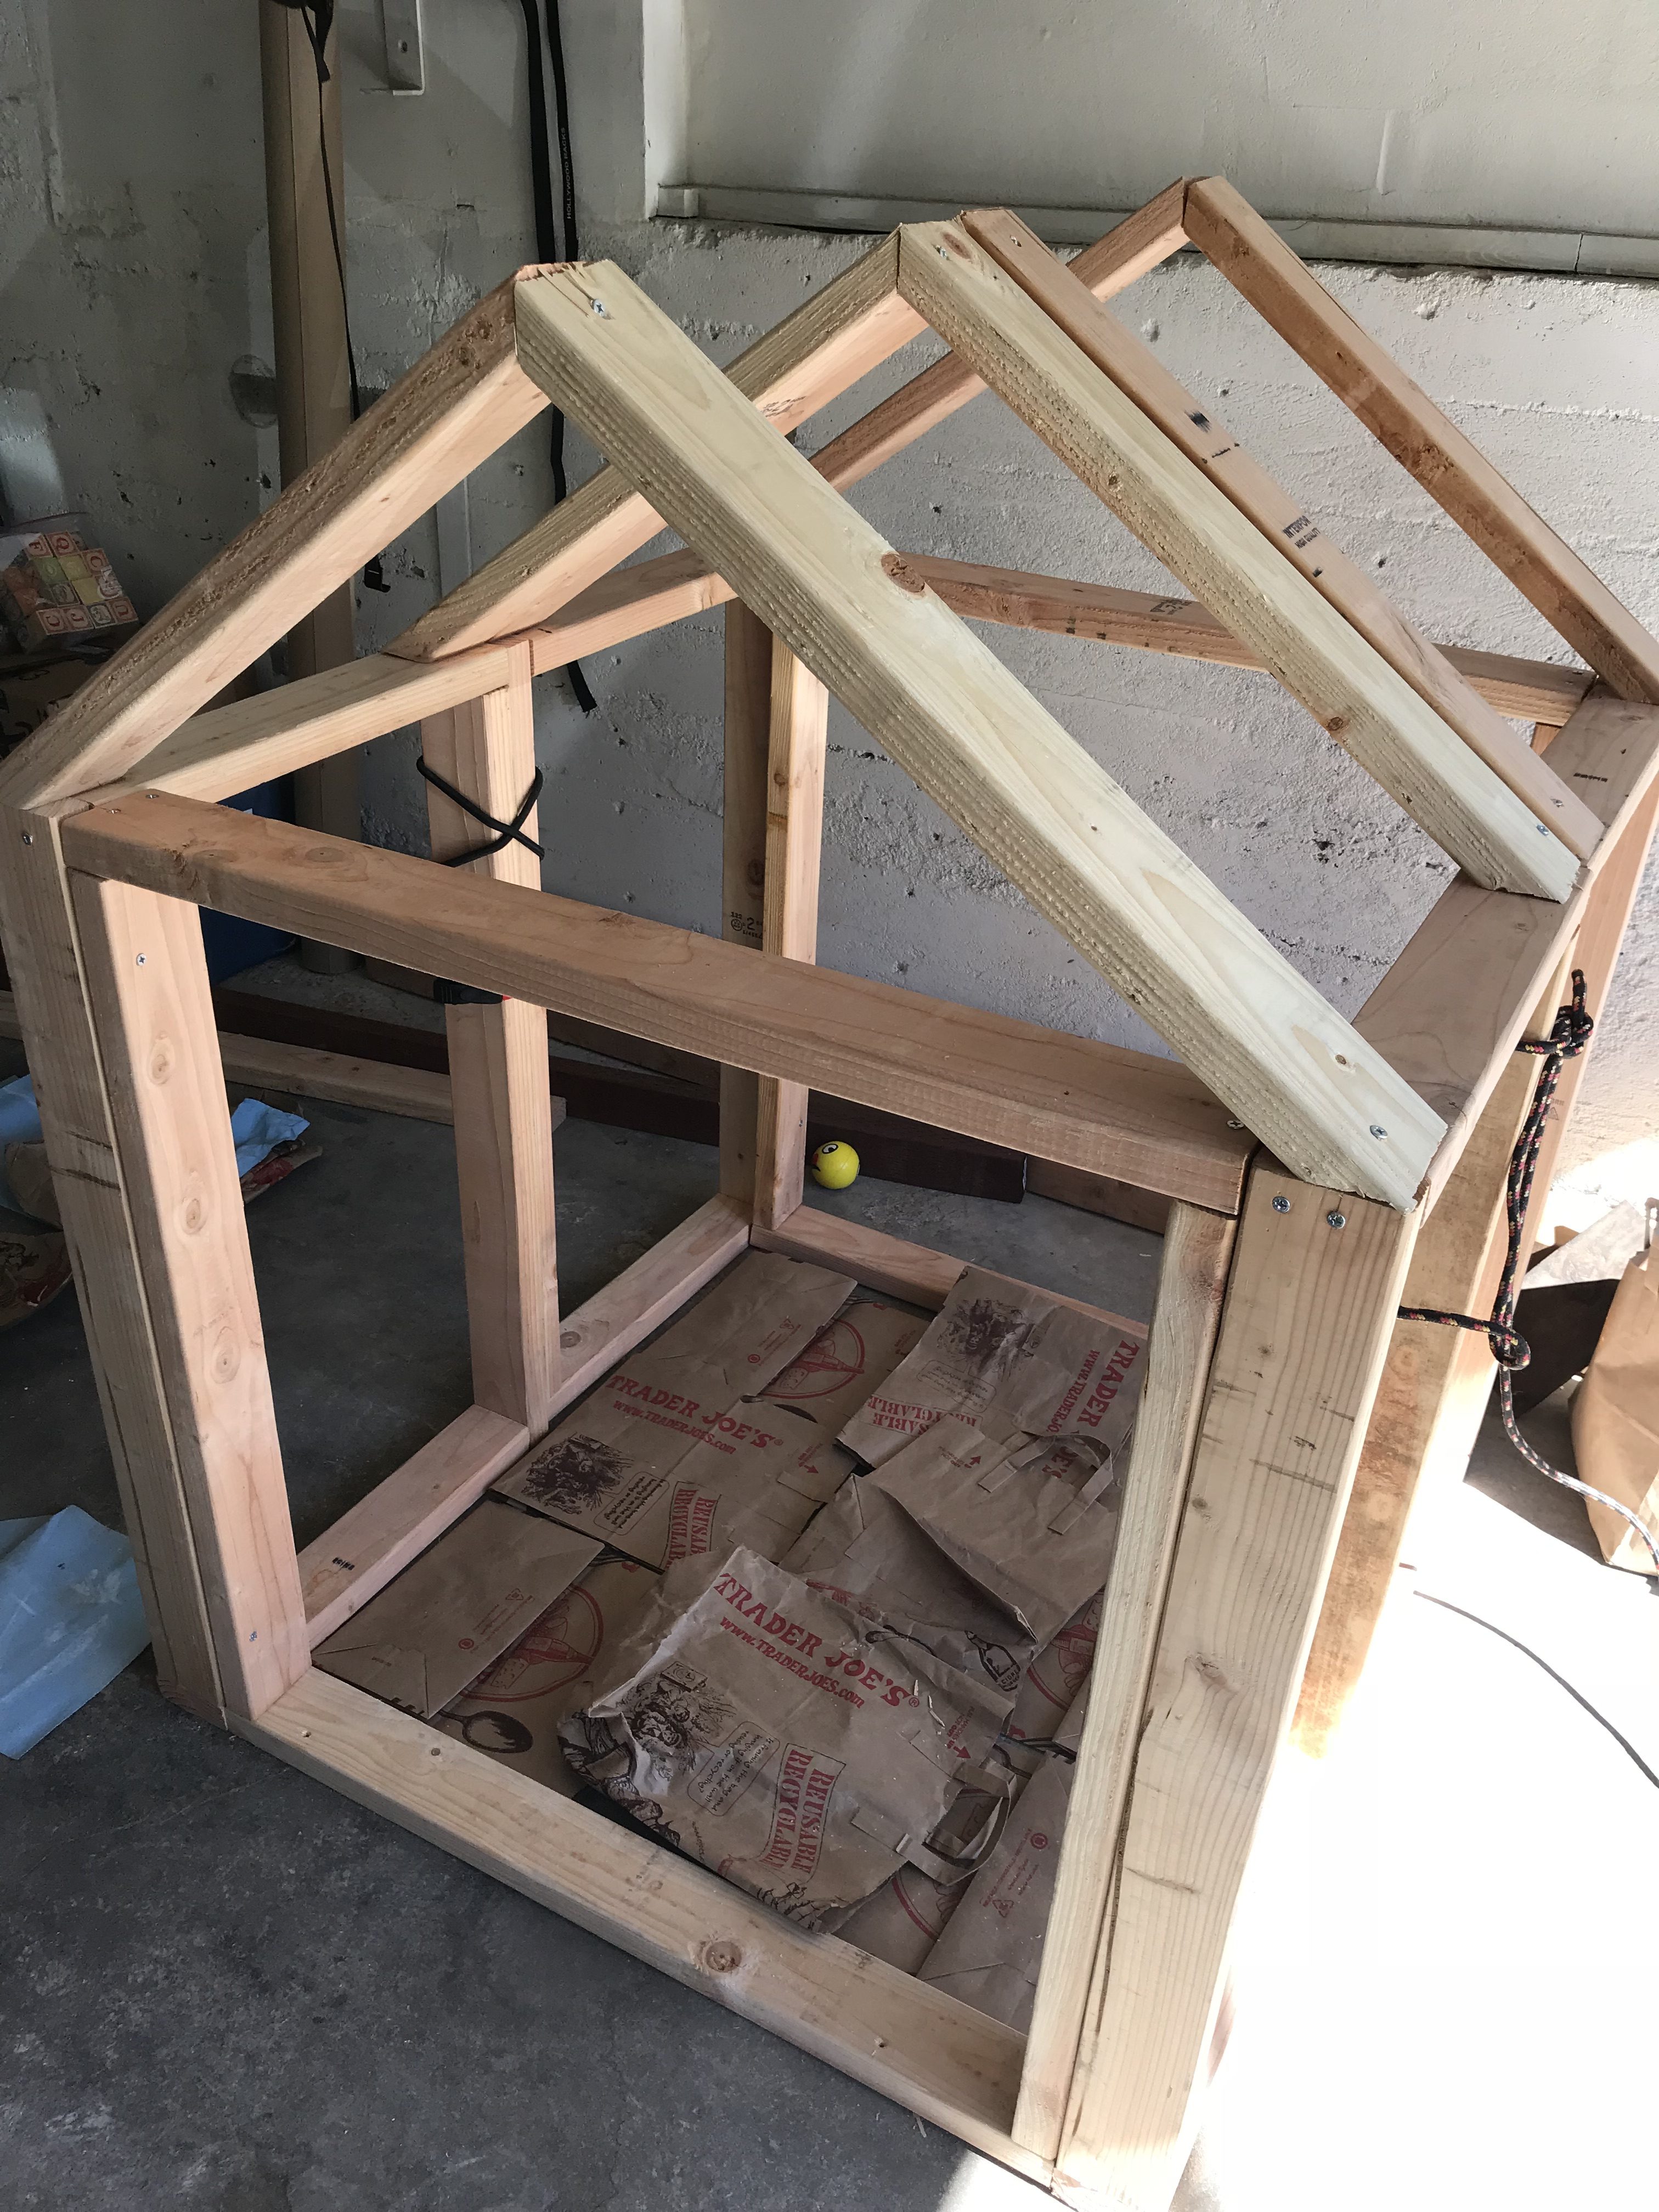 The frame was lots of fun to put together, and my wife was quite patient about her car being kicked out of the garage for a while. Pretty soon, however, she did start asking questions.
“Where are you going to put that thing?”
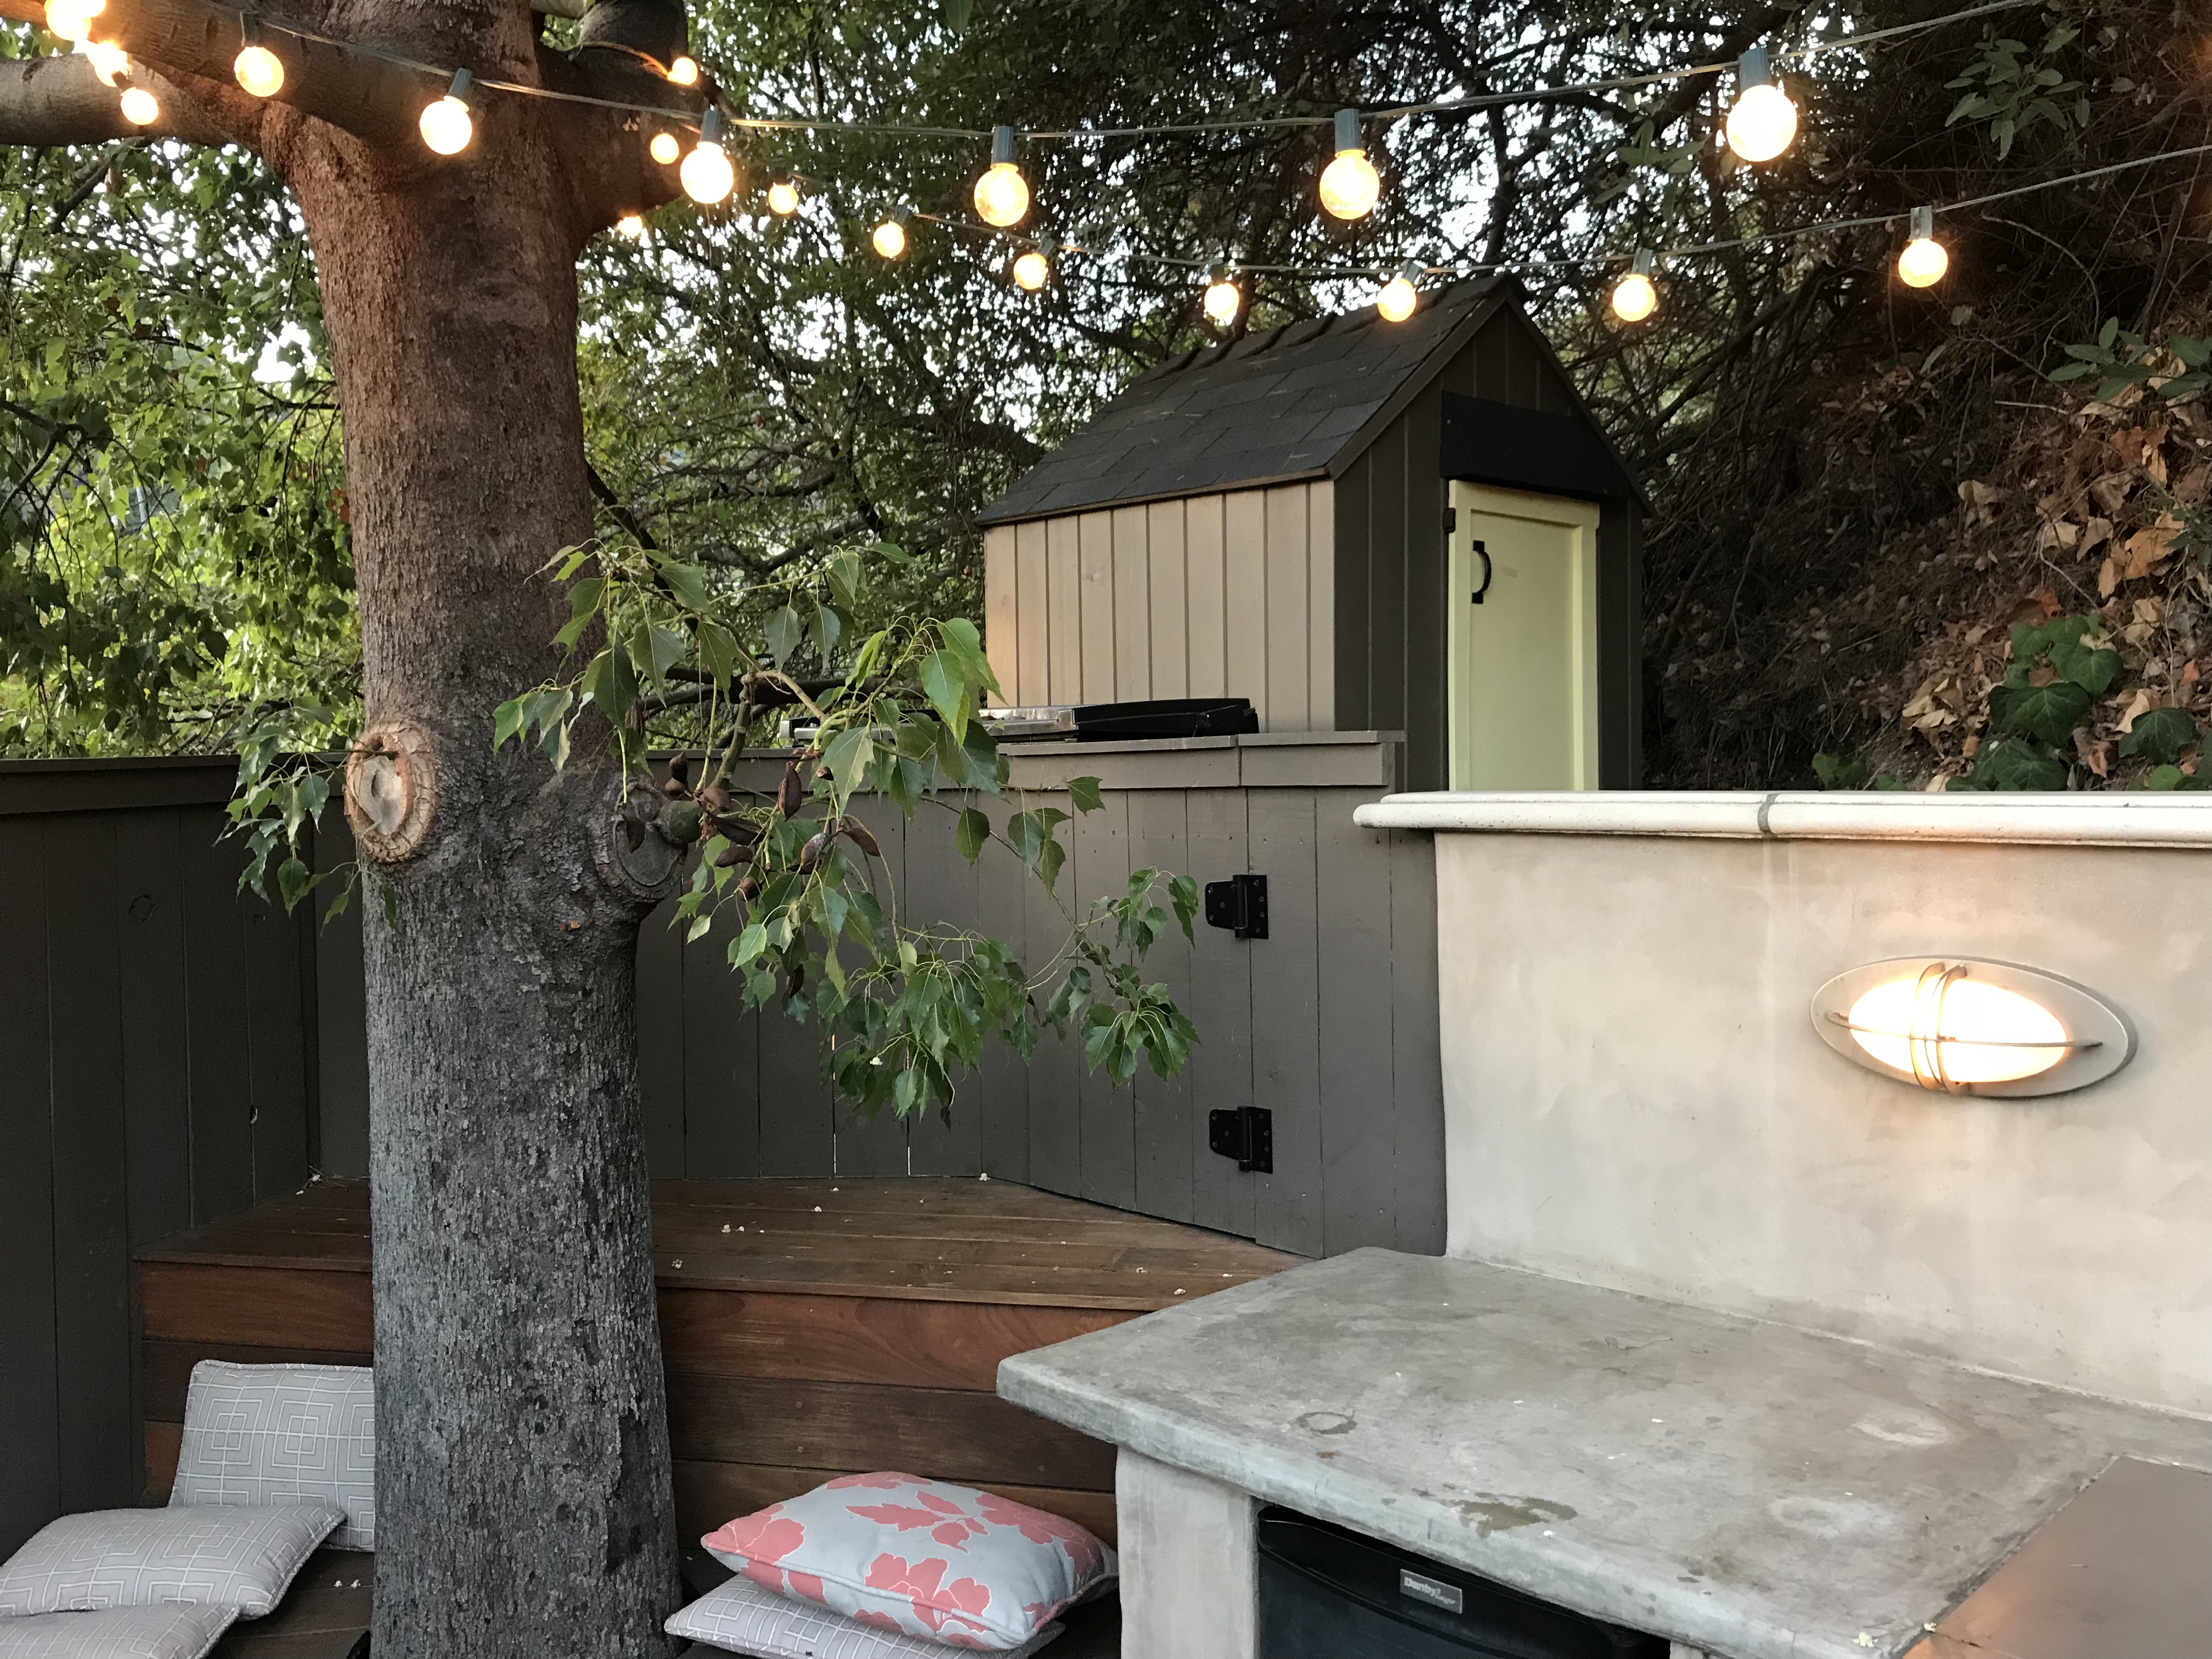
At first, I was considering a corner of the garage. However, once it started going together, I realized that it wouldn’t fit in there. After some discussion, we settled on a quiet little corner of the yard, behind our deck. It was a perfect spot – shaded, with only brush and a sloping hill to deal with.
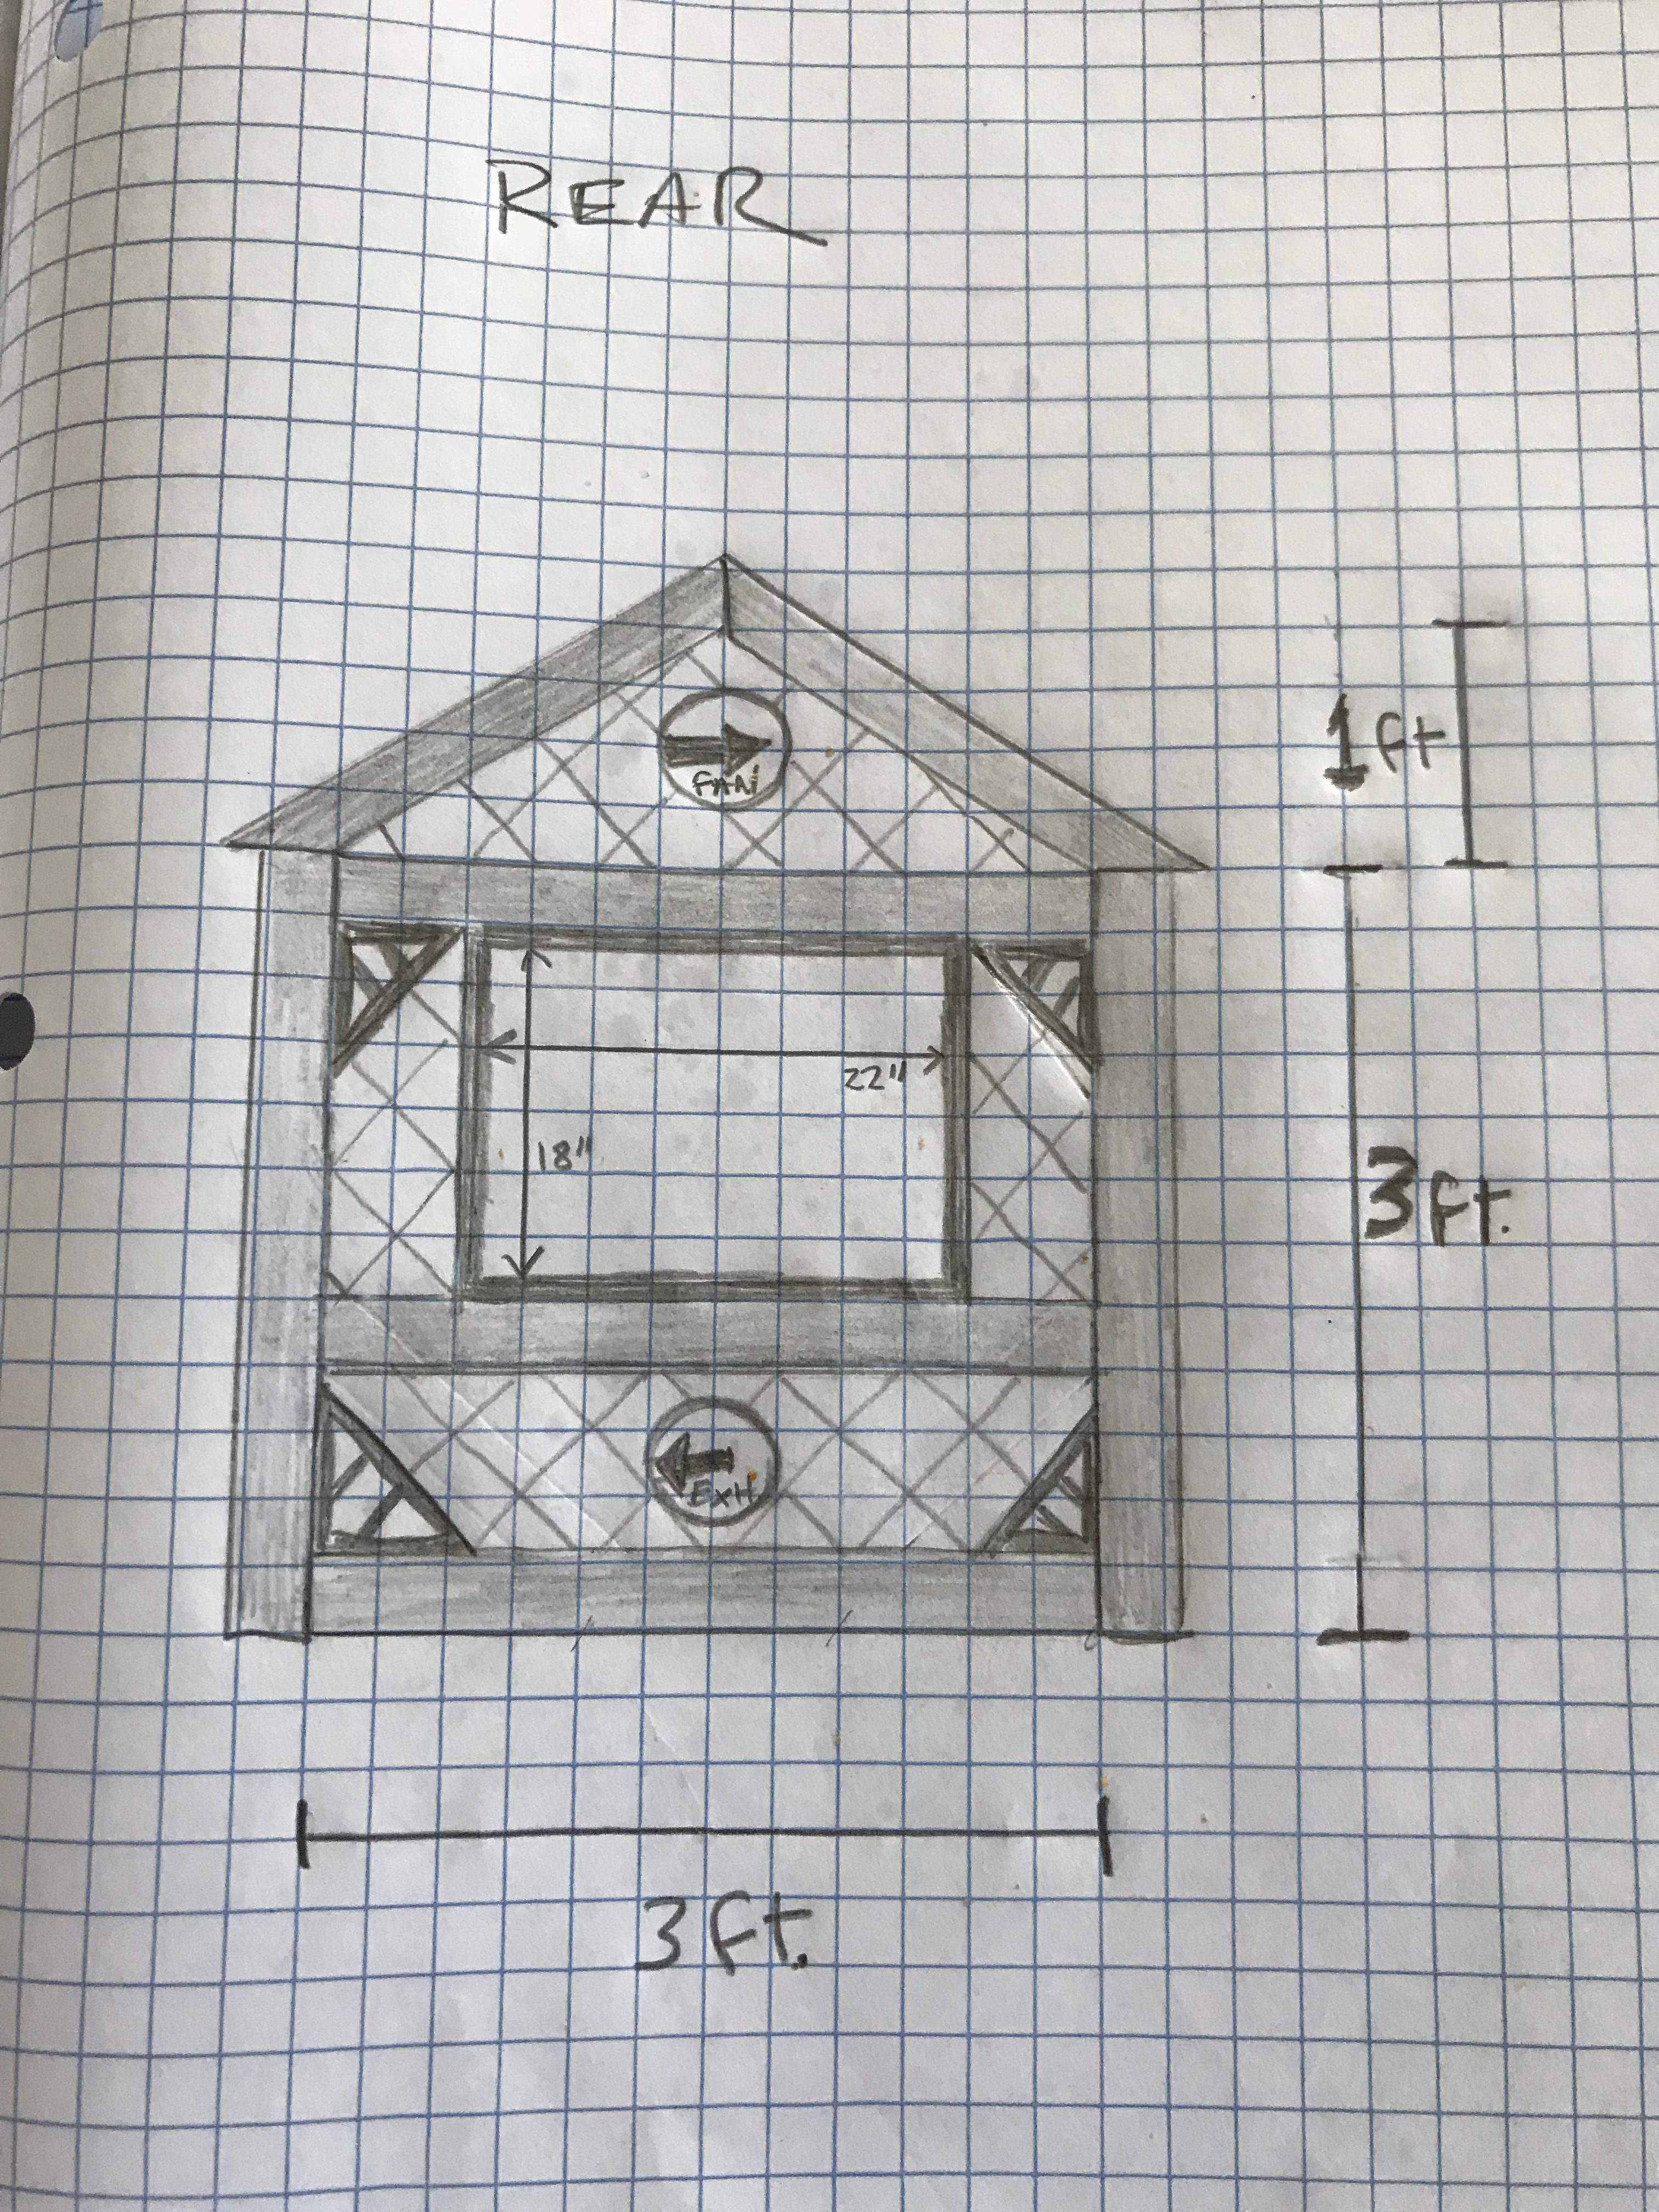
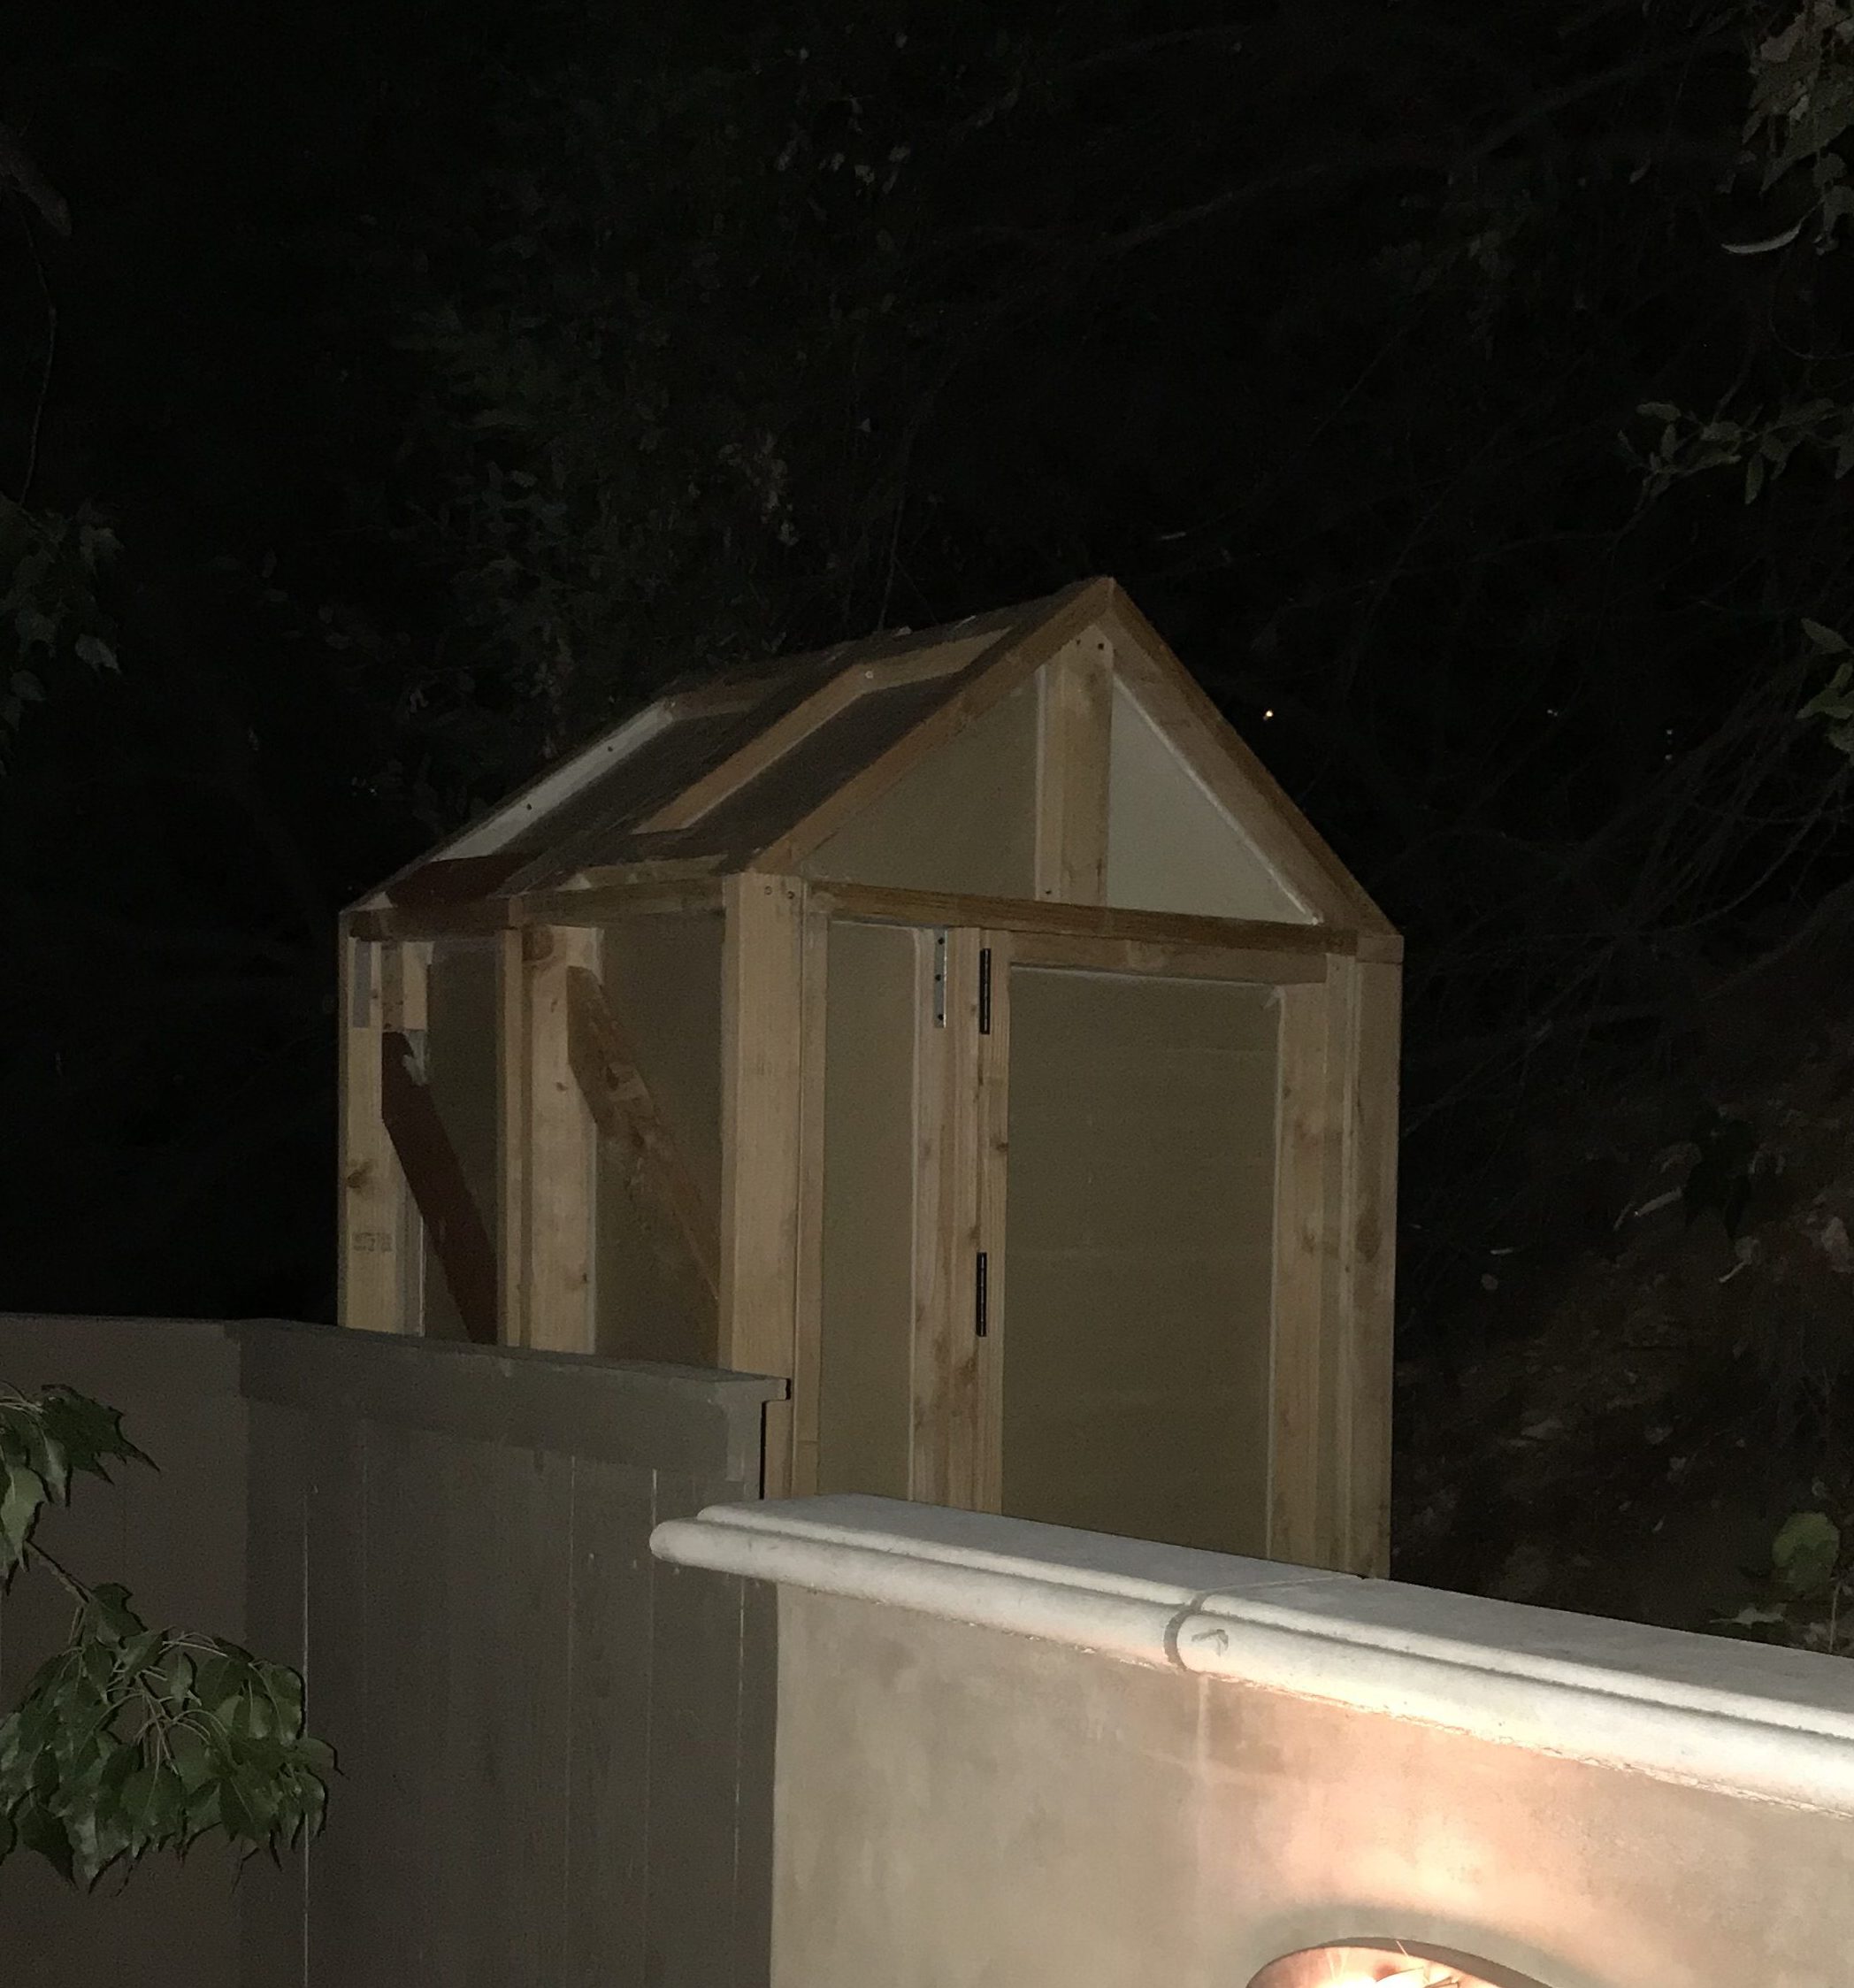
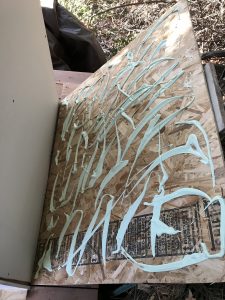
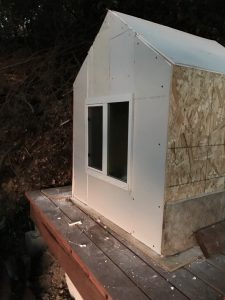
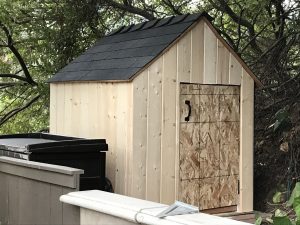
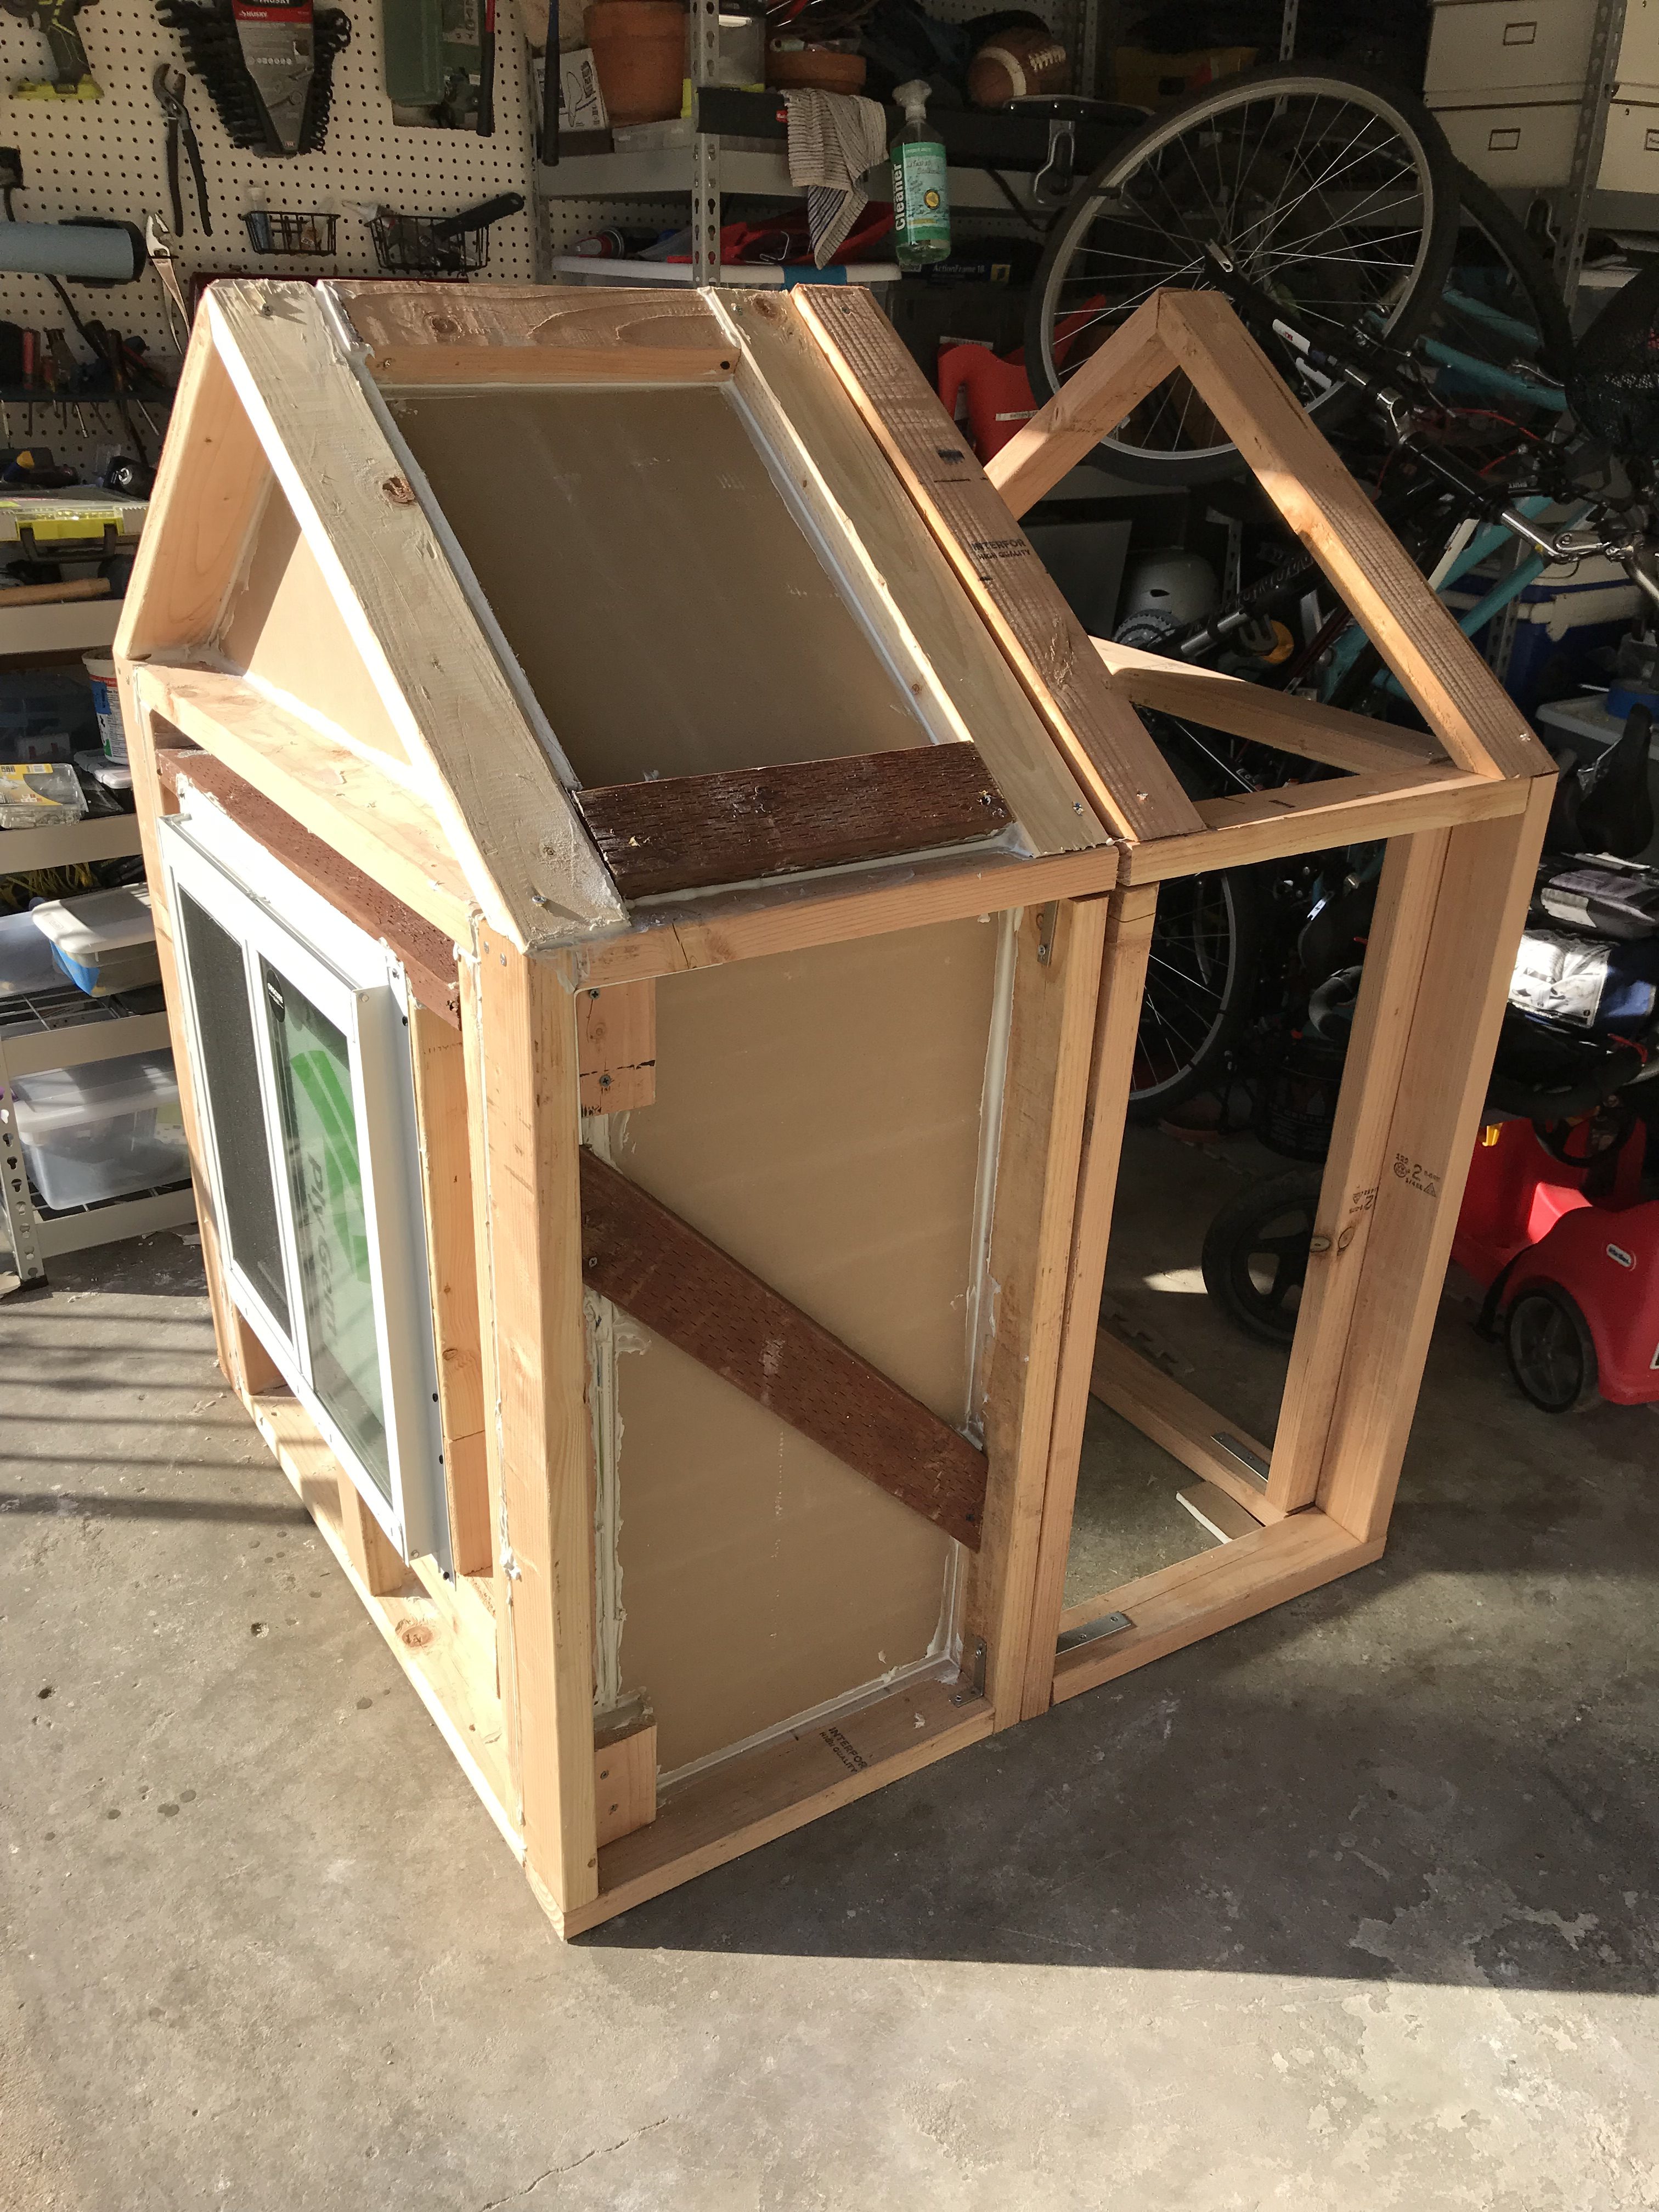 Before moving it from the garage, I added a prefabricated window to what would be the back and the first layer of drywall, using Green Glue sealant to seal up the cracks in the frame. It was starting to look pretty cool! One thing I hadn’t decide on was a floor, so I built it without one for the time being. I framed a door with 2x4s and hung it with a couple of hinges. My idea was I would just layer up the door along with the rest of the hut in order to make it just as sound isolating.
 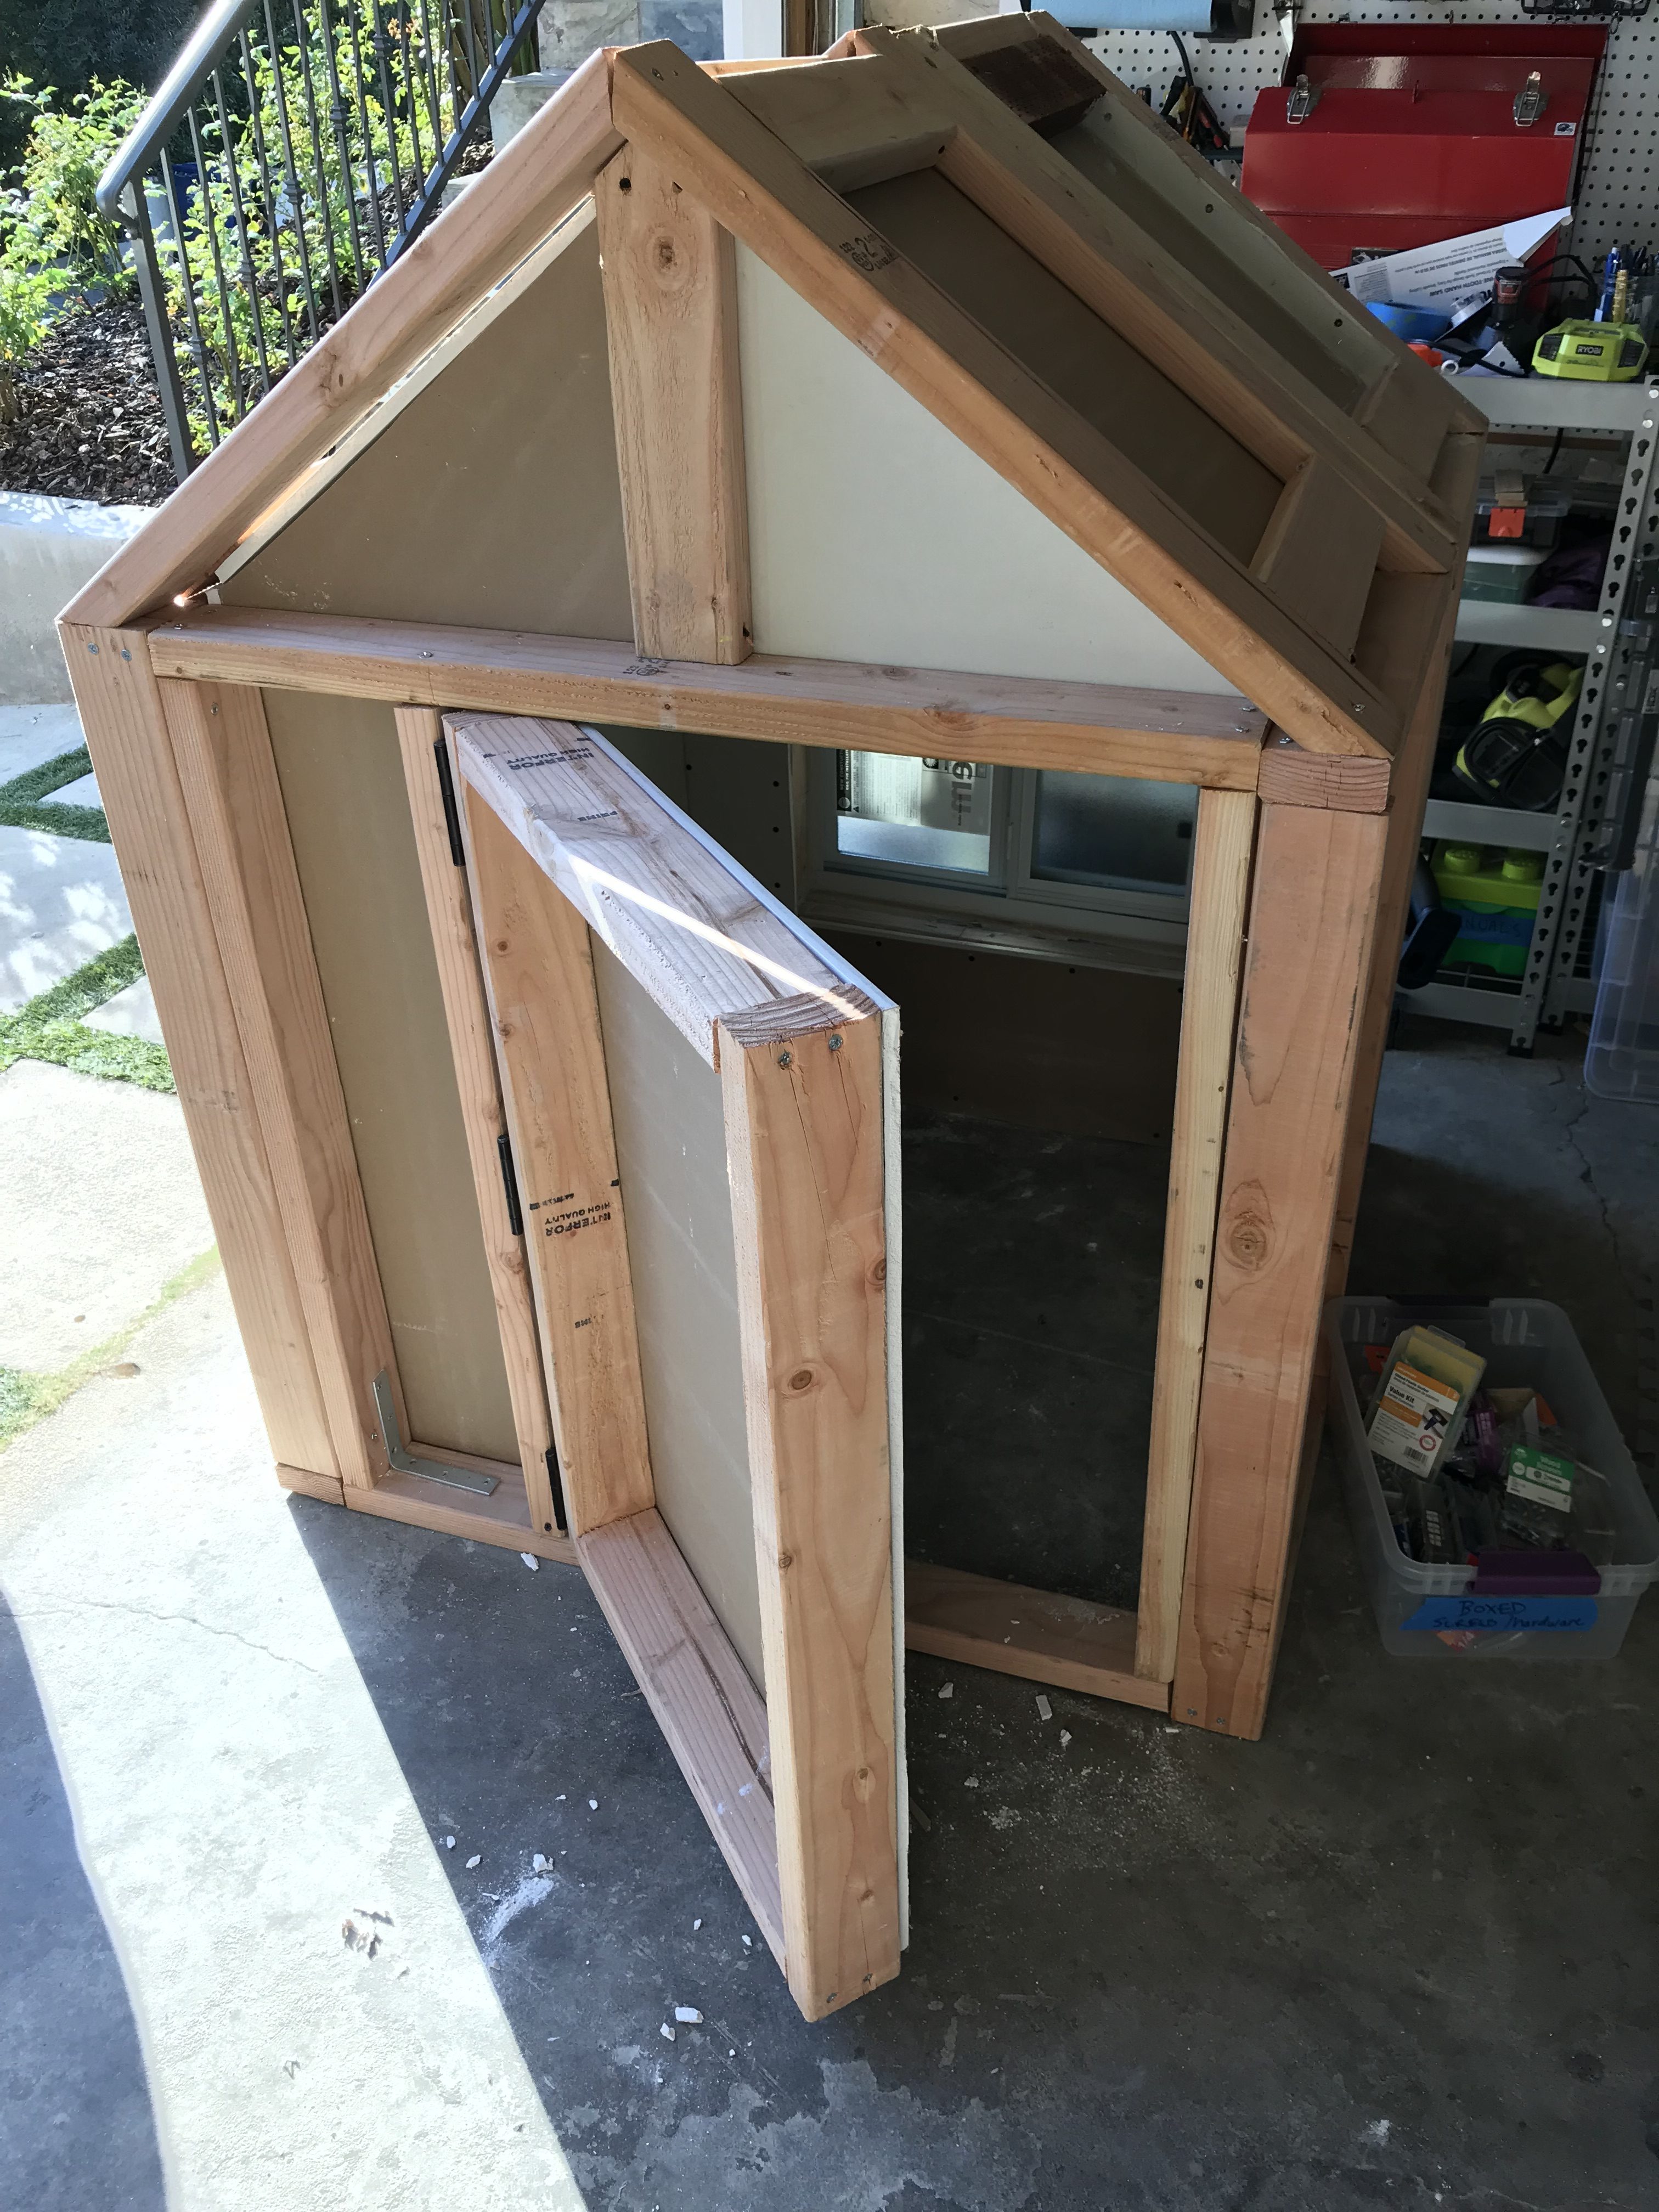 It was a little bit awkward trying to hang a door like that, but after some trial and error, I got it to fit and open and close OK.
The next step was to create a place for my little hut to sit in the back yard. I decided that since I might want to move it later, it would be good to create a platform on which it could rest. First, I leveled a spot by digging into the sloped hillside. That wasn’t easy. 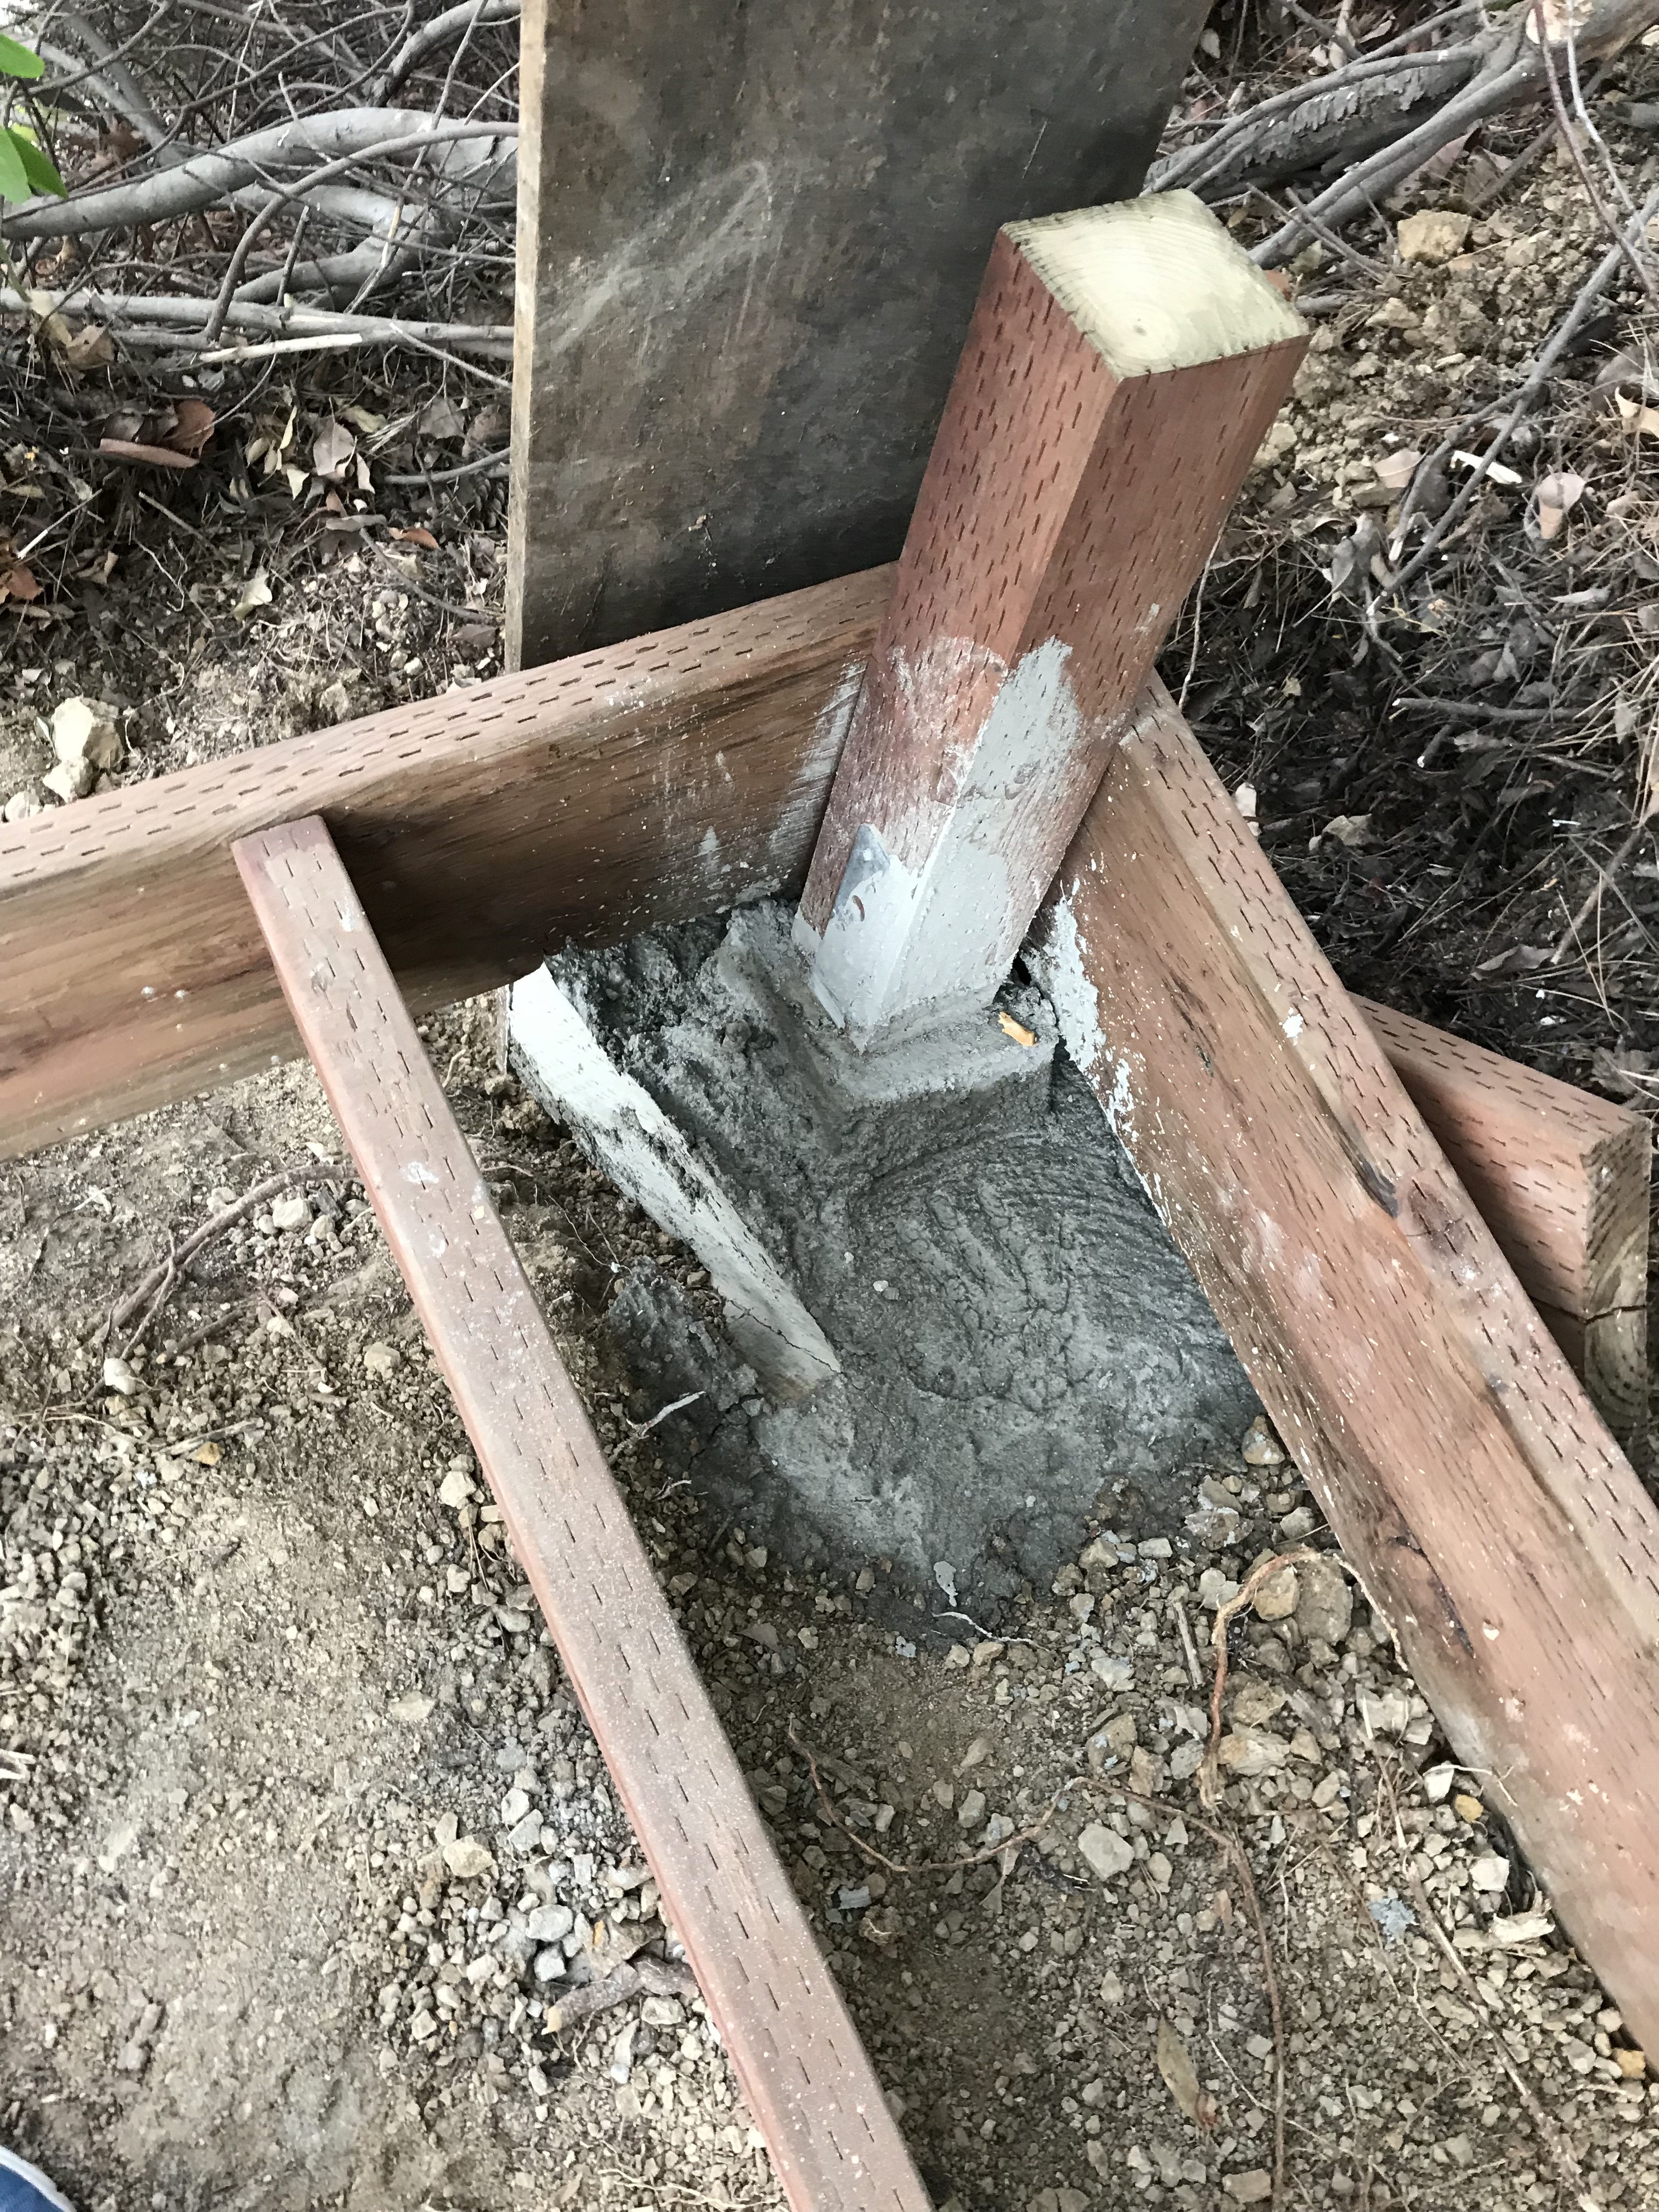 To start holding up the dirt I removed, I poured two large cement feet on the low side to anchor the legs of the new deck. Once I had the legs in place, I was able to connect them with 2x10s. It took some time to get the legs in place and to get everything square and level. Once I did that, I was able to finish the excavation. One big challenge I had was keeping the dirt from continuing to slide down the hill. The solution was buying 4-foot rebar pots and driving them down into the bedrock beneath. Then I added a bunch of cinder blocks and other spare masonry from around the house in order to hold back the dirt. Joists came next, and for those I also used treated lumber, as I knew that the dirt would continue to slide down the hill and probably make contact.
With the joists in place, it really started to look like a deck, and I started getting really excited about putting my hut in this new spot. One thing I realized when working back there was that it is the coolest, most quiet place on my property. It is naturally shaded by brush and trees above, keeping it very comfortable! 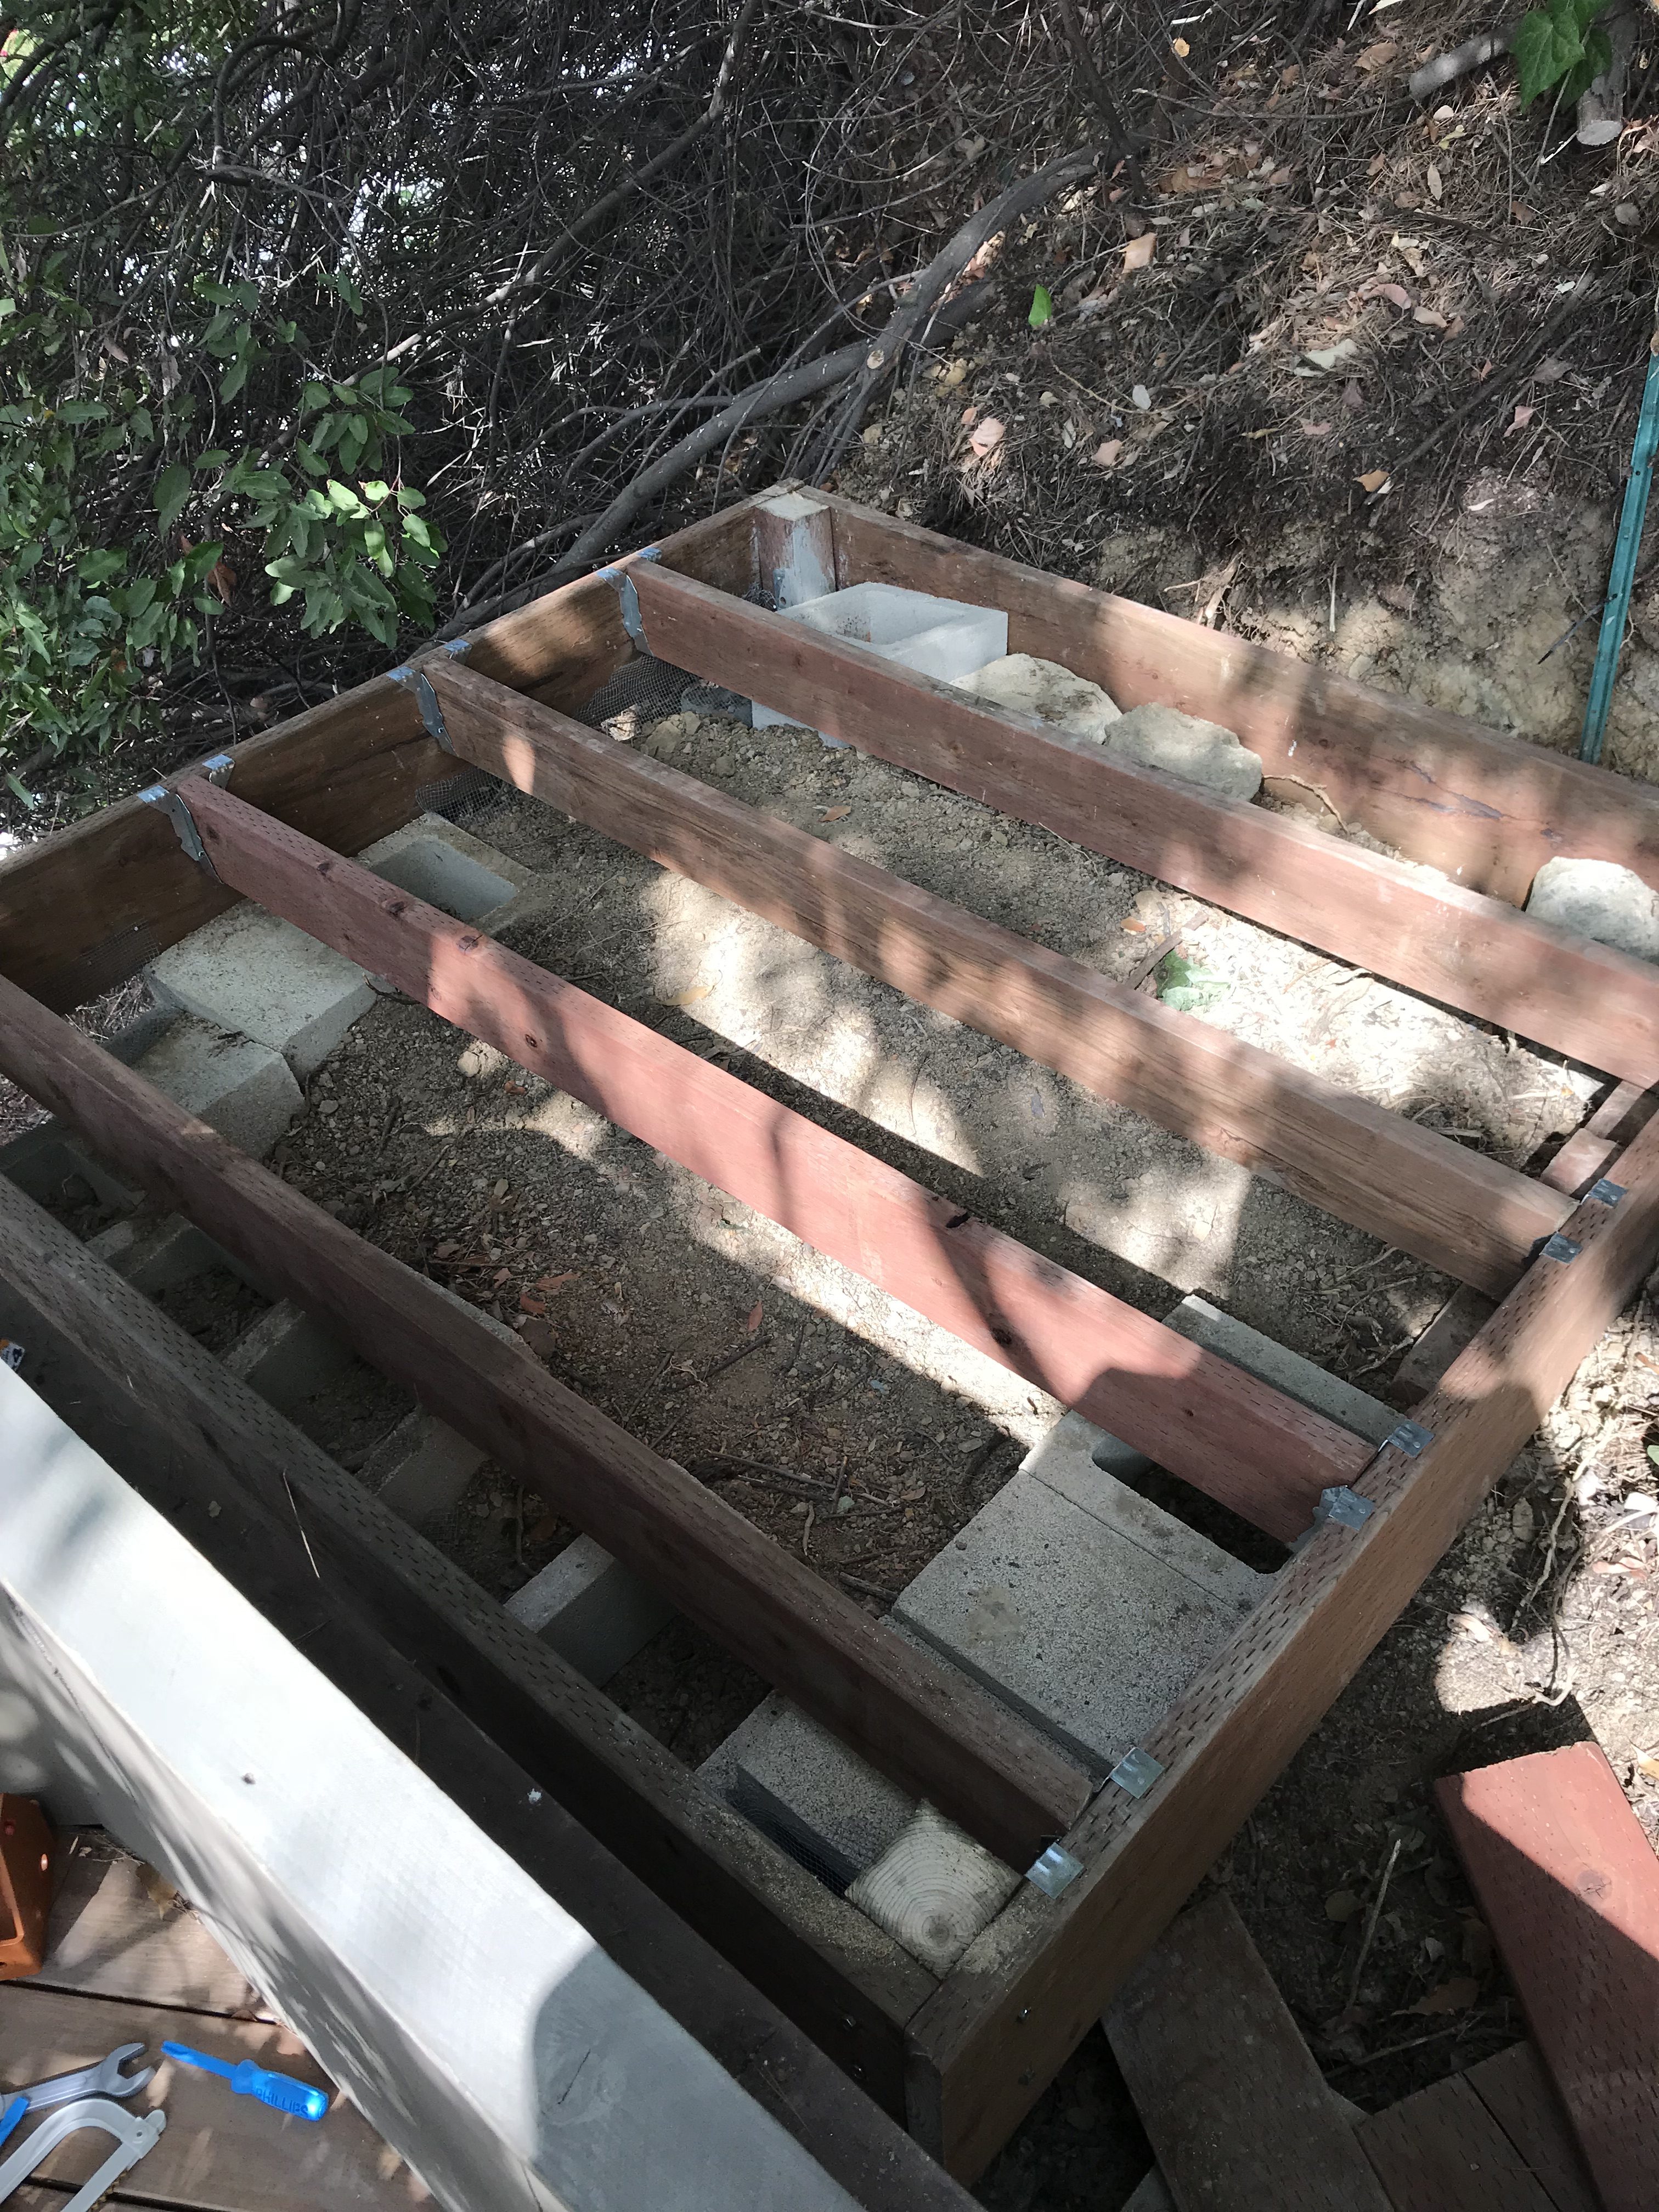 It is also tucked back against the hillside in a bit of a corner, protecting it from sound to some degree.
After finishing the joists, I attached some wire mesh all around the outside to seal off around the bottom of the structure. My hope is that I can prevent mammals from taking up residence under this small deck. A couple years ago, we had a skunk move in below our deck. Thankfully it was just visiting, but encouraging it to seek refuge elsewhere proved to be a challenge. Getting under the deck in order to fill the holes it was using as doors while it was away was a bit scary. I really didn’t want to come face-to-face with our black and white guest. I want to avoid having that happen again.
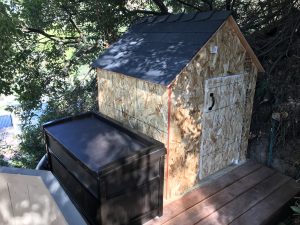
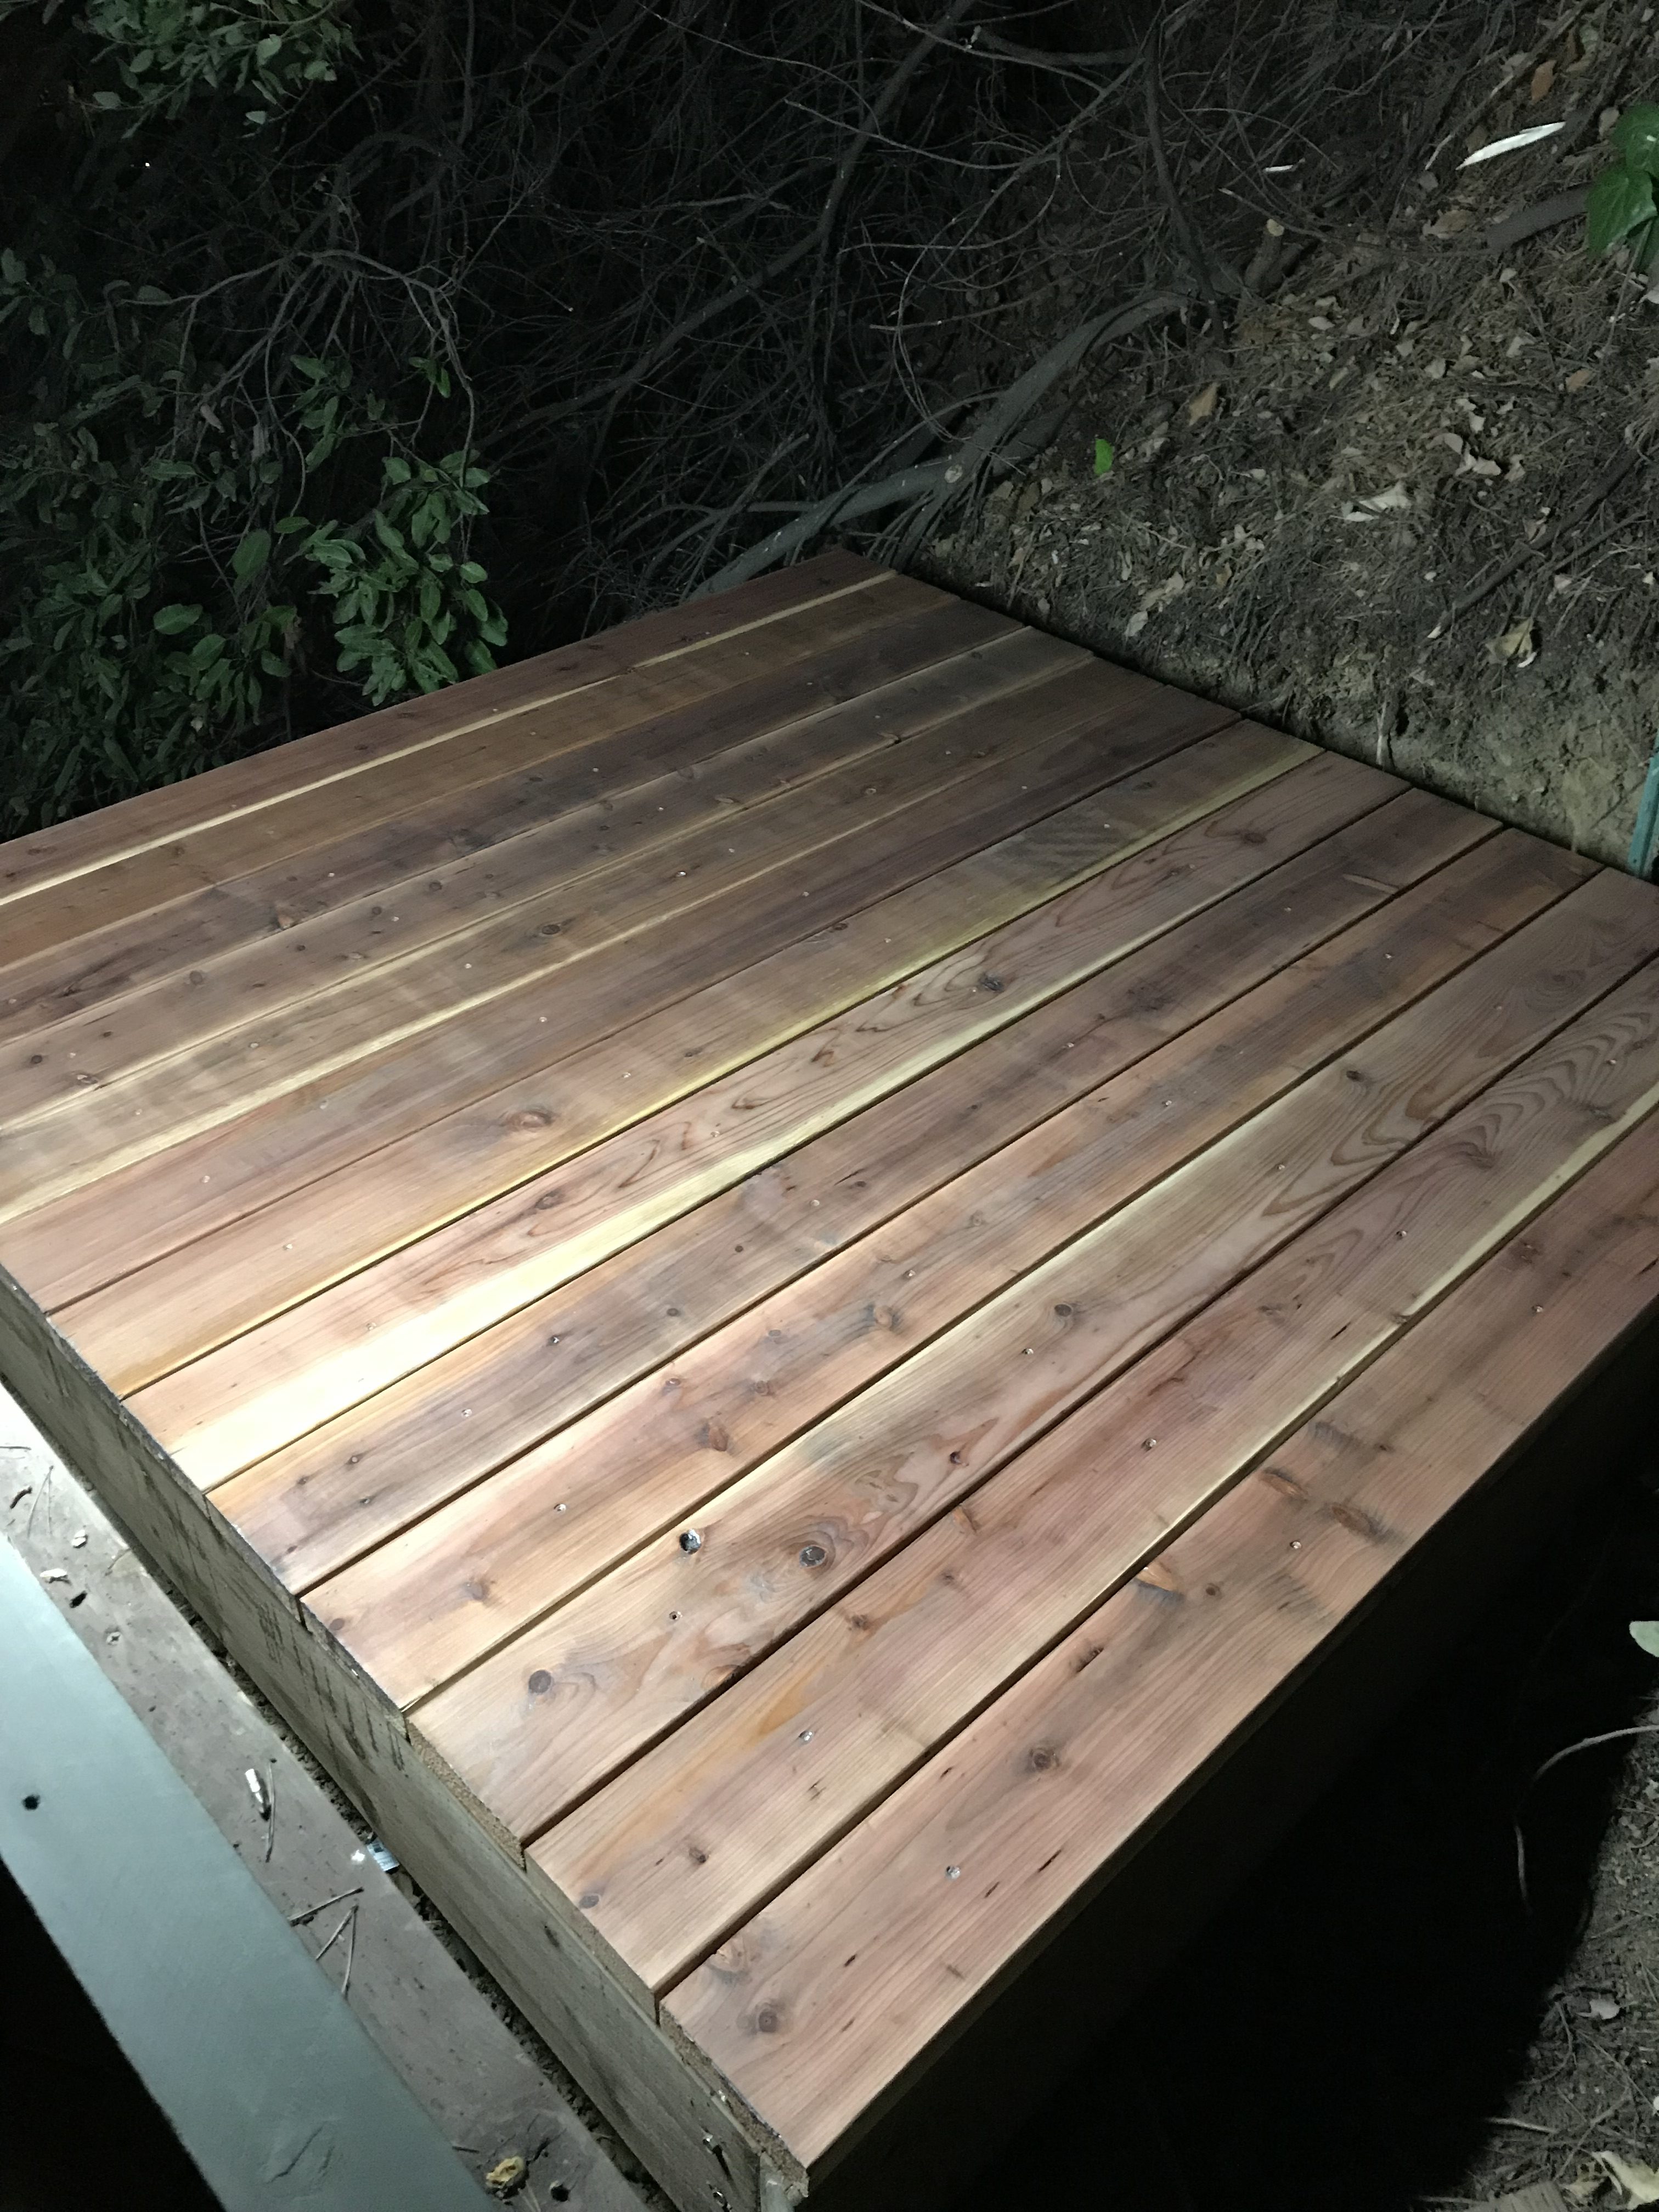 The next step was screwing down some decking. After sanding it a bit, I gave it a quick coat of water seal to help keep it protected from the elements. My new deck looked great, and it was time to move the hut from the garage into the back yard. My neighbor helped me walk it around the house and up to the back deck. Before I hoisted it over the grill onto my new deck, I connected the front and back together and attached a piece of plywood to the bottom to serve as a temporary floor. Realizing I have the floor sitting directly on the deck, I added a base made of 2x4s sitting the long way. Since my deck is up against and touching the back of my grill, I also decided it would help keep my hut quiet to isolate the structure from the deck beneath. So instead of attaching it, I decided to set the structure on top of u-shaped pieces of rubber. These “u-boats” as they are called, are typically used on floor joists in sound studios to make what are called floating floors.
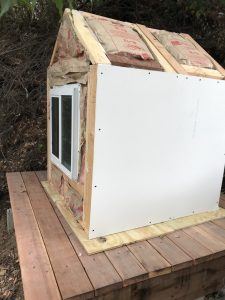
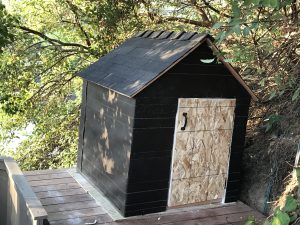
With the structure in place, I first filled the frame with insulation, and then started layering it with drywall to make things nice and quiet inside. I put 2 layers outside and 3 layers inside. Each layer was sandwiched to the next using Green Glue. After layers of drywall, I added a layer of OSB outside, followed by tar paper to resist the weather. I also added 2 more layers of flooring with Green Glue. Finally, the outside got tongue and groove pine siding, and the inside got a piece of smooth cedar plywood as flooring.


The ventilation box went together quickly. I added a carbon filter on the outside of the box, and a 12-inch muffler on the exhaust side to prevent sound from coming back in. I may add some pictures of the ventilation box later.
Other related details include a piece of plexiglass outside the window to block sound, and electric outlet with USB, and an ethernet drop.
I’m proud of how my little hut turned out. When inside, it cuts 20-25 dB from the ambient noise level. On a Friday or Saturday night, I can sit peacefully without even noticing the parties going on in the hills around me. And while it will never stop me from hearing a helicopter going by, it makes even loud dogs barking sound like they are far away. More importantly, it is my cozy, happy little retreat space. Just stepping into it puts me in a focused, relaxed state of mind. Somewhat ironically, the more I sit in my escape pod, the less often I feel like I need to escape.